How to track Custom Events with Google Tag Manager and GA4
Standard events are cool, but what really matters is unique to your business. Here‘s how you can track that.

Justus
owntag Founder
published June 27, 2021
In this article, you’ll learn
- What a Custom (dataLayer) Event is and how to add it to your website
- How to react to it with a trigger in Google Tag Manager
- The configuration for your Google Analytics 4 tags so you new event shows up there
Events! How do they work?
I am guessing you want to track some sort of action on your website, maybe something your users do like creating a new account for themselves.
Here are the parts you’ll need:
Google Analytics events
Whenever something like that happens and you want to analyze it with Google Analytics, that’s an event. Every event has a name so you know not just that something happened but also what.
Things like login, purchase, search, select_content, pretty much anything is possible.
dataLayer events
In order to have those events appear in GA, you’ll need to configure Google Tag Manager to make sure it sends the events to Google Analytics in the first place.
To let GTM know something interesting has happened, you need a dataLayer event.
The dataLayer is the message queue between your website and GTM.
A dataLayer event is one of those messages.
To configure Google Tag Manager to react and do something based on a dataLayer event, you’ll use a Trigger.
Custom events
There are a whole lot of dataLayer events built into GTM and they will pop up in dataLayer without you configuring anything. Some examples:
gtm.domfor when the browser has finished loading the elements that make up the pagegtm.clickfor clicksgtm.formSubmitwhen the user submits a form
and many more…
But none of those really tell us something about your business specifically.
That’s why you came here, to learn about Custom Events. They are supposed to be customized to you and your analytics needs. What someone else might consider a “sign up” in their company might be a “free trial” for you.
Summary: Event tracking basics
Quick recap!
Let’s say we want to track an event in GA4 whenever someone registers on our website:
- The website has to let Google Tag Manager know that a registration has happened with a dataLayer event
- Google Tag Manager reacts to the dataLayer event with a Trigger and sends a Google Analytics event to Google Analytics.
For our example in the rest of the article, let’s call our Google Analytics event sign_up.
Conincidentally this event name is also one of Google Analytics 4’s “Recommended Events”. That doesn’t mean much right now, but maybe they will offer dedicated reports for events with those specific names sometime in the future.
Choose whatever seems logical to you in the long term.
The Custom Event
Google Tag Manager can’t possibly know what constitutes a signup on your website unless you explicitly tell it.
You (if you know HTML and JavaScript) or more likely your developer will have to implement the dataLayer event in your website.
Analysts and marketers who are new to GTM are often under the impression that they can implement tracking 100% on their own, without any development work on the website itself.
At least in cases like these that involve customization, that’s not true. If you’re not a developer yourself, you definitely will need support from one.
Specifically, this is the JavaScript code you have to execute whenever a user registers:
window.dataLayer = window.dataLayer || []
window.dataLayer.push({
    event: "sign_up"
})
Instead of sign_up you can insert any event name that describes the action you want to track.
If you need to know more about your event in order to properly analyze it later in Google Analytics, you can add additional information to the event.
We might want to track whether or not the user accepted our offer to receive some spammy marketing our valuable emails.
window.dataLayer = window.dataLayer || []
window.dataLayer.push({
    event: "sign_up",
    email_newsletter: true
})
The dataLayer event doesn’t have to have the exact same name that you want to show up in Google Analytics. It’s totally possible to have a registration dataLayer event and let that trigger a sign_up in GA. If you’re starting fresh though, I’d recommend keeping the naming consistent in dataLayer and GA to avoid confusion.
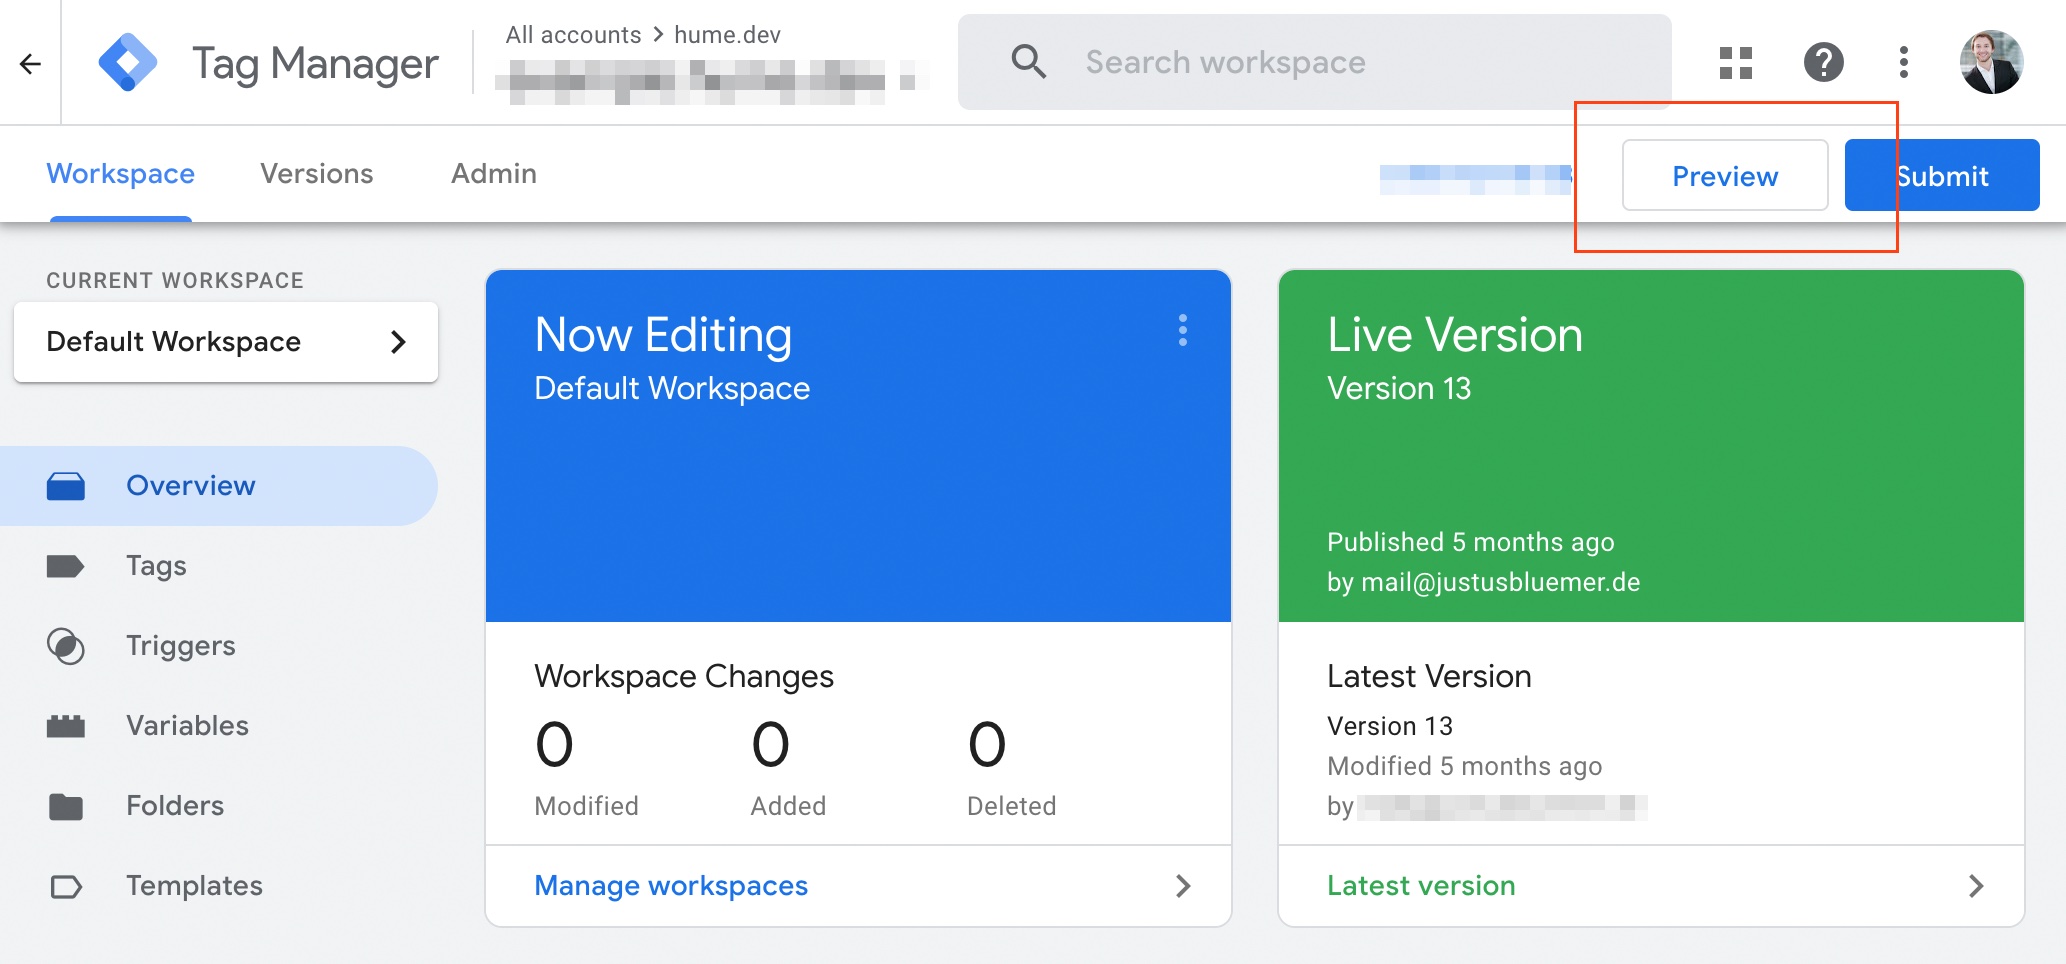
After the code is implemented, make sure it actually works with Google Tag Manager’s built-in Preview Mode.
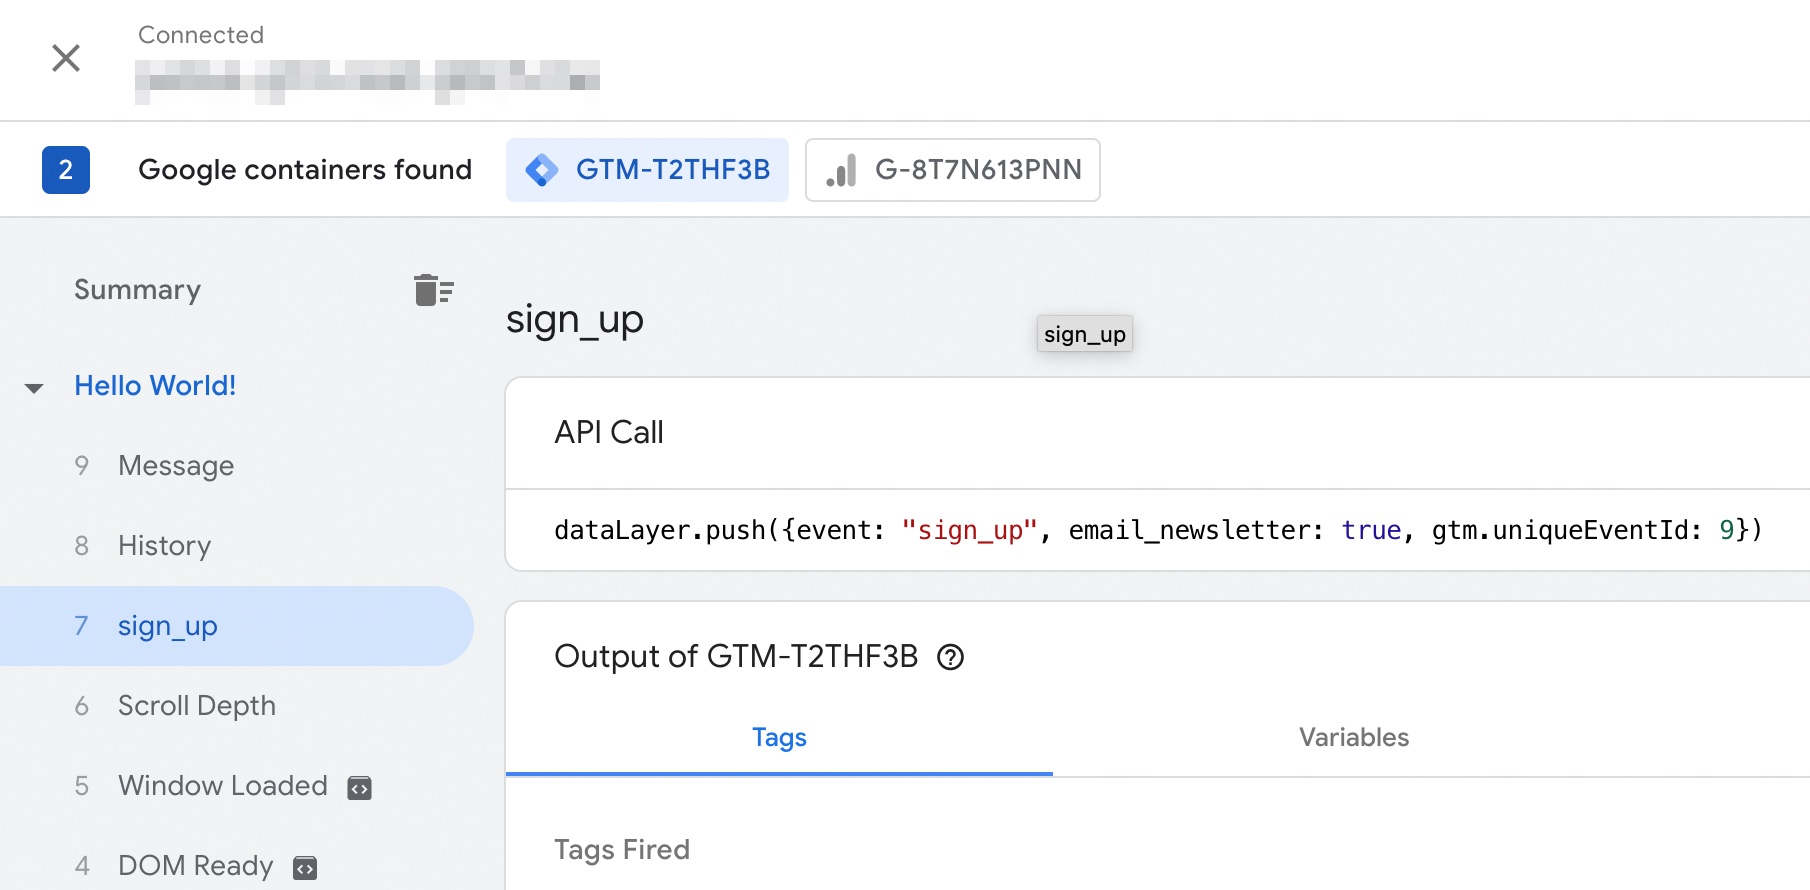
When you complete a test signup (or whatever your event is), your event should show up on the lefthand site in your preview window:
The trigger
Once you’ve confirmed that the dataLayer event is set up and working, you’ll need to tell Google Tag Manager to react to it and actually do something when it registers the event.
For that, you’ll need to create a trigger.
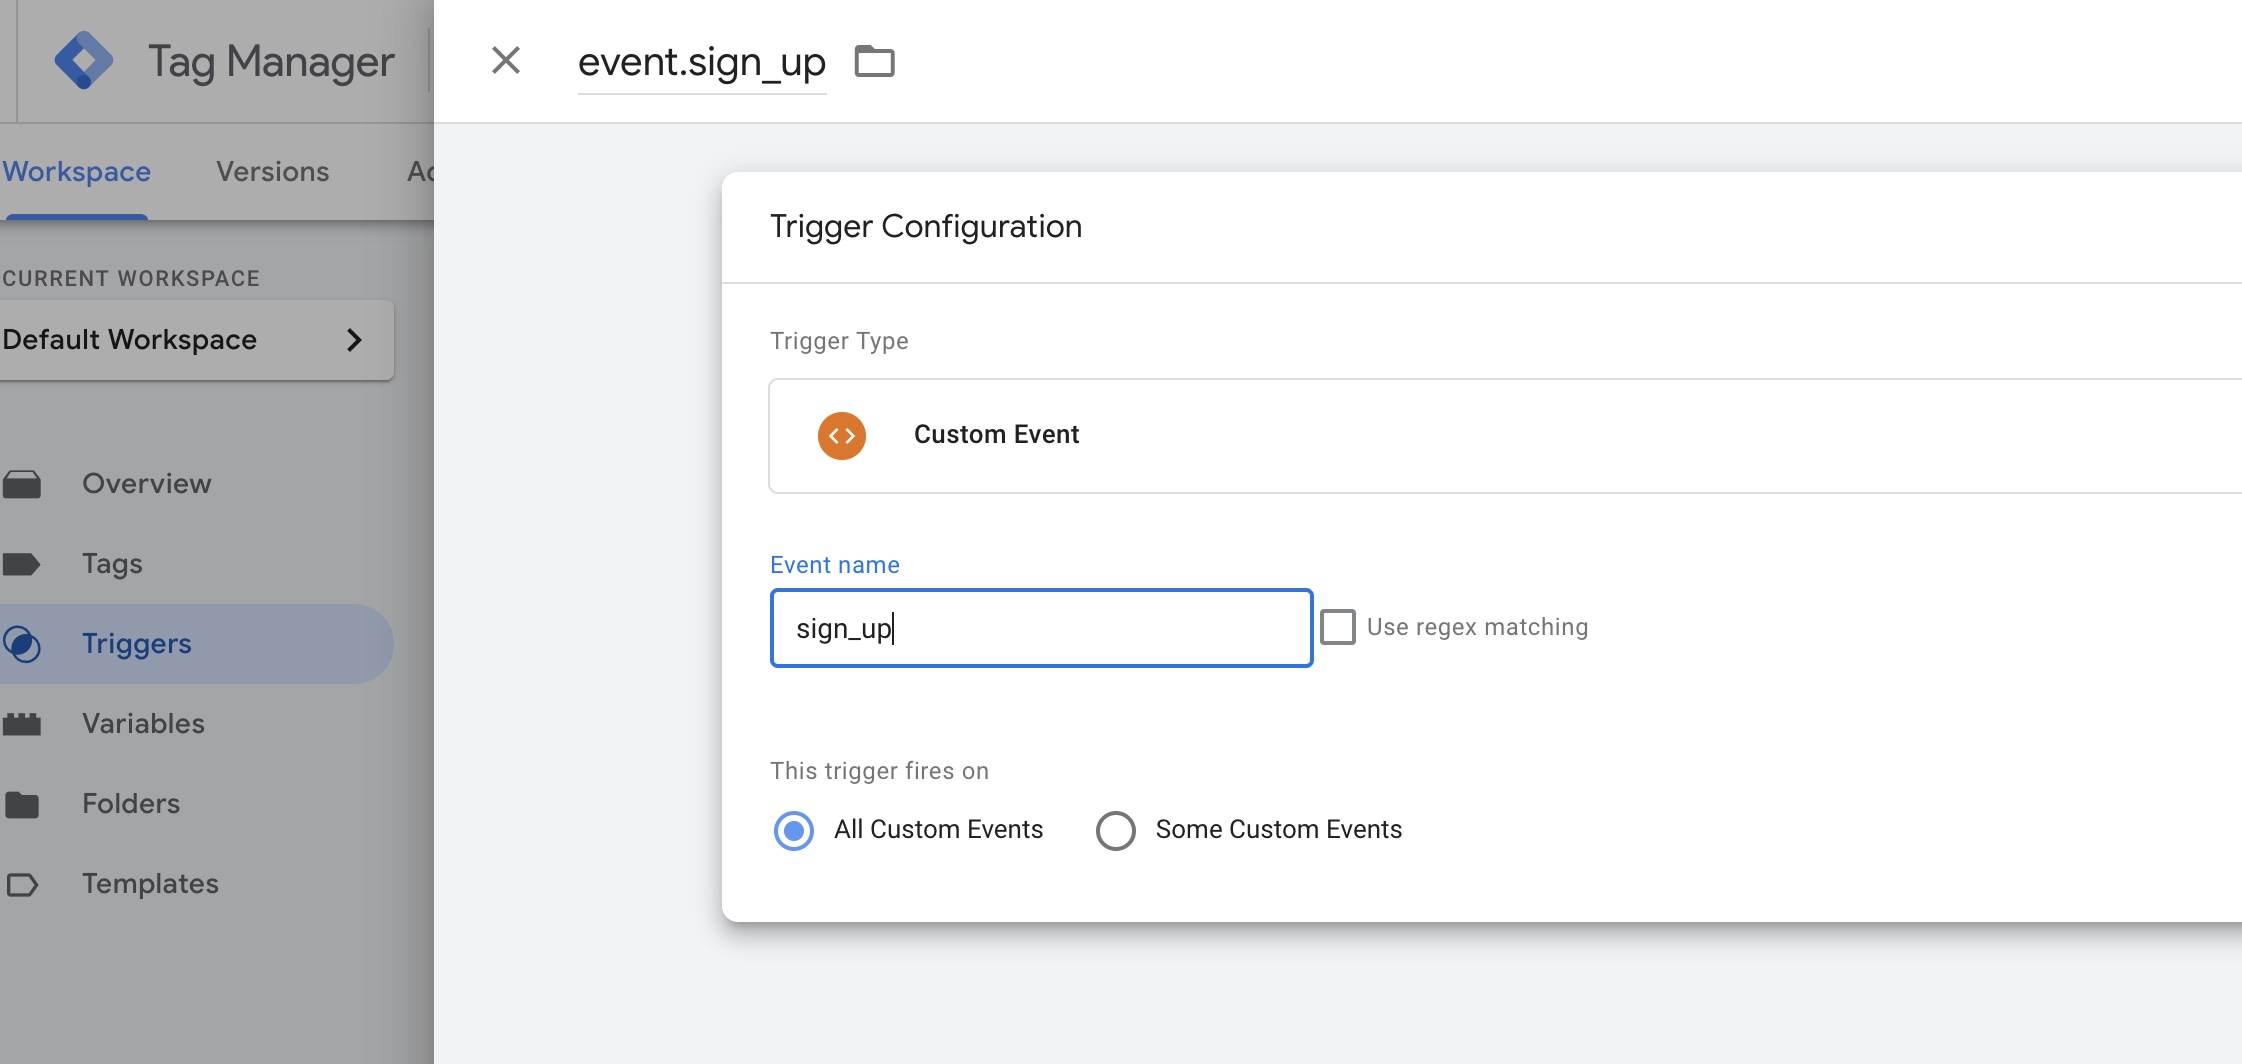
Go to the “Triggers” section in GTM and hit the “New” button. Per my Google Tag Manager best practices I’ll name the trigger “event.sign_up”, but that’s up to you.
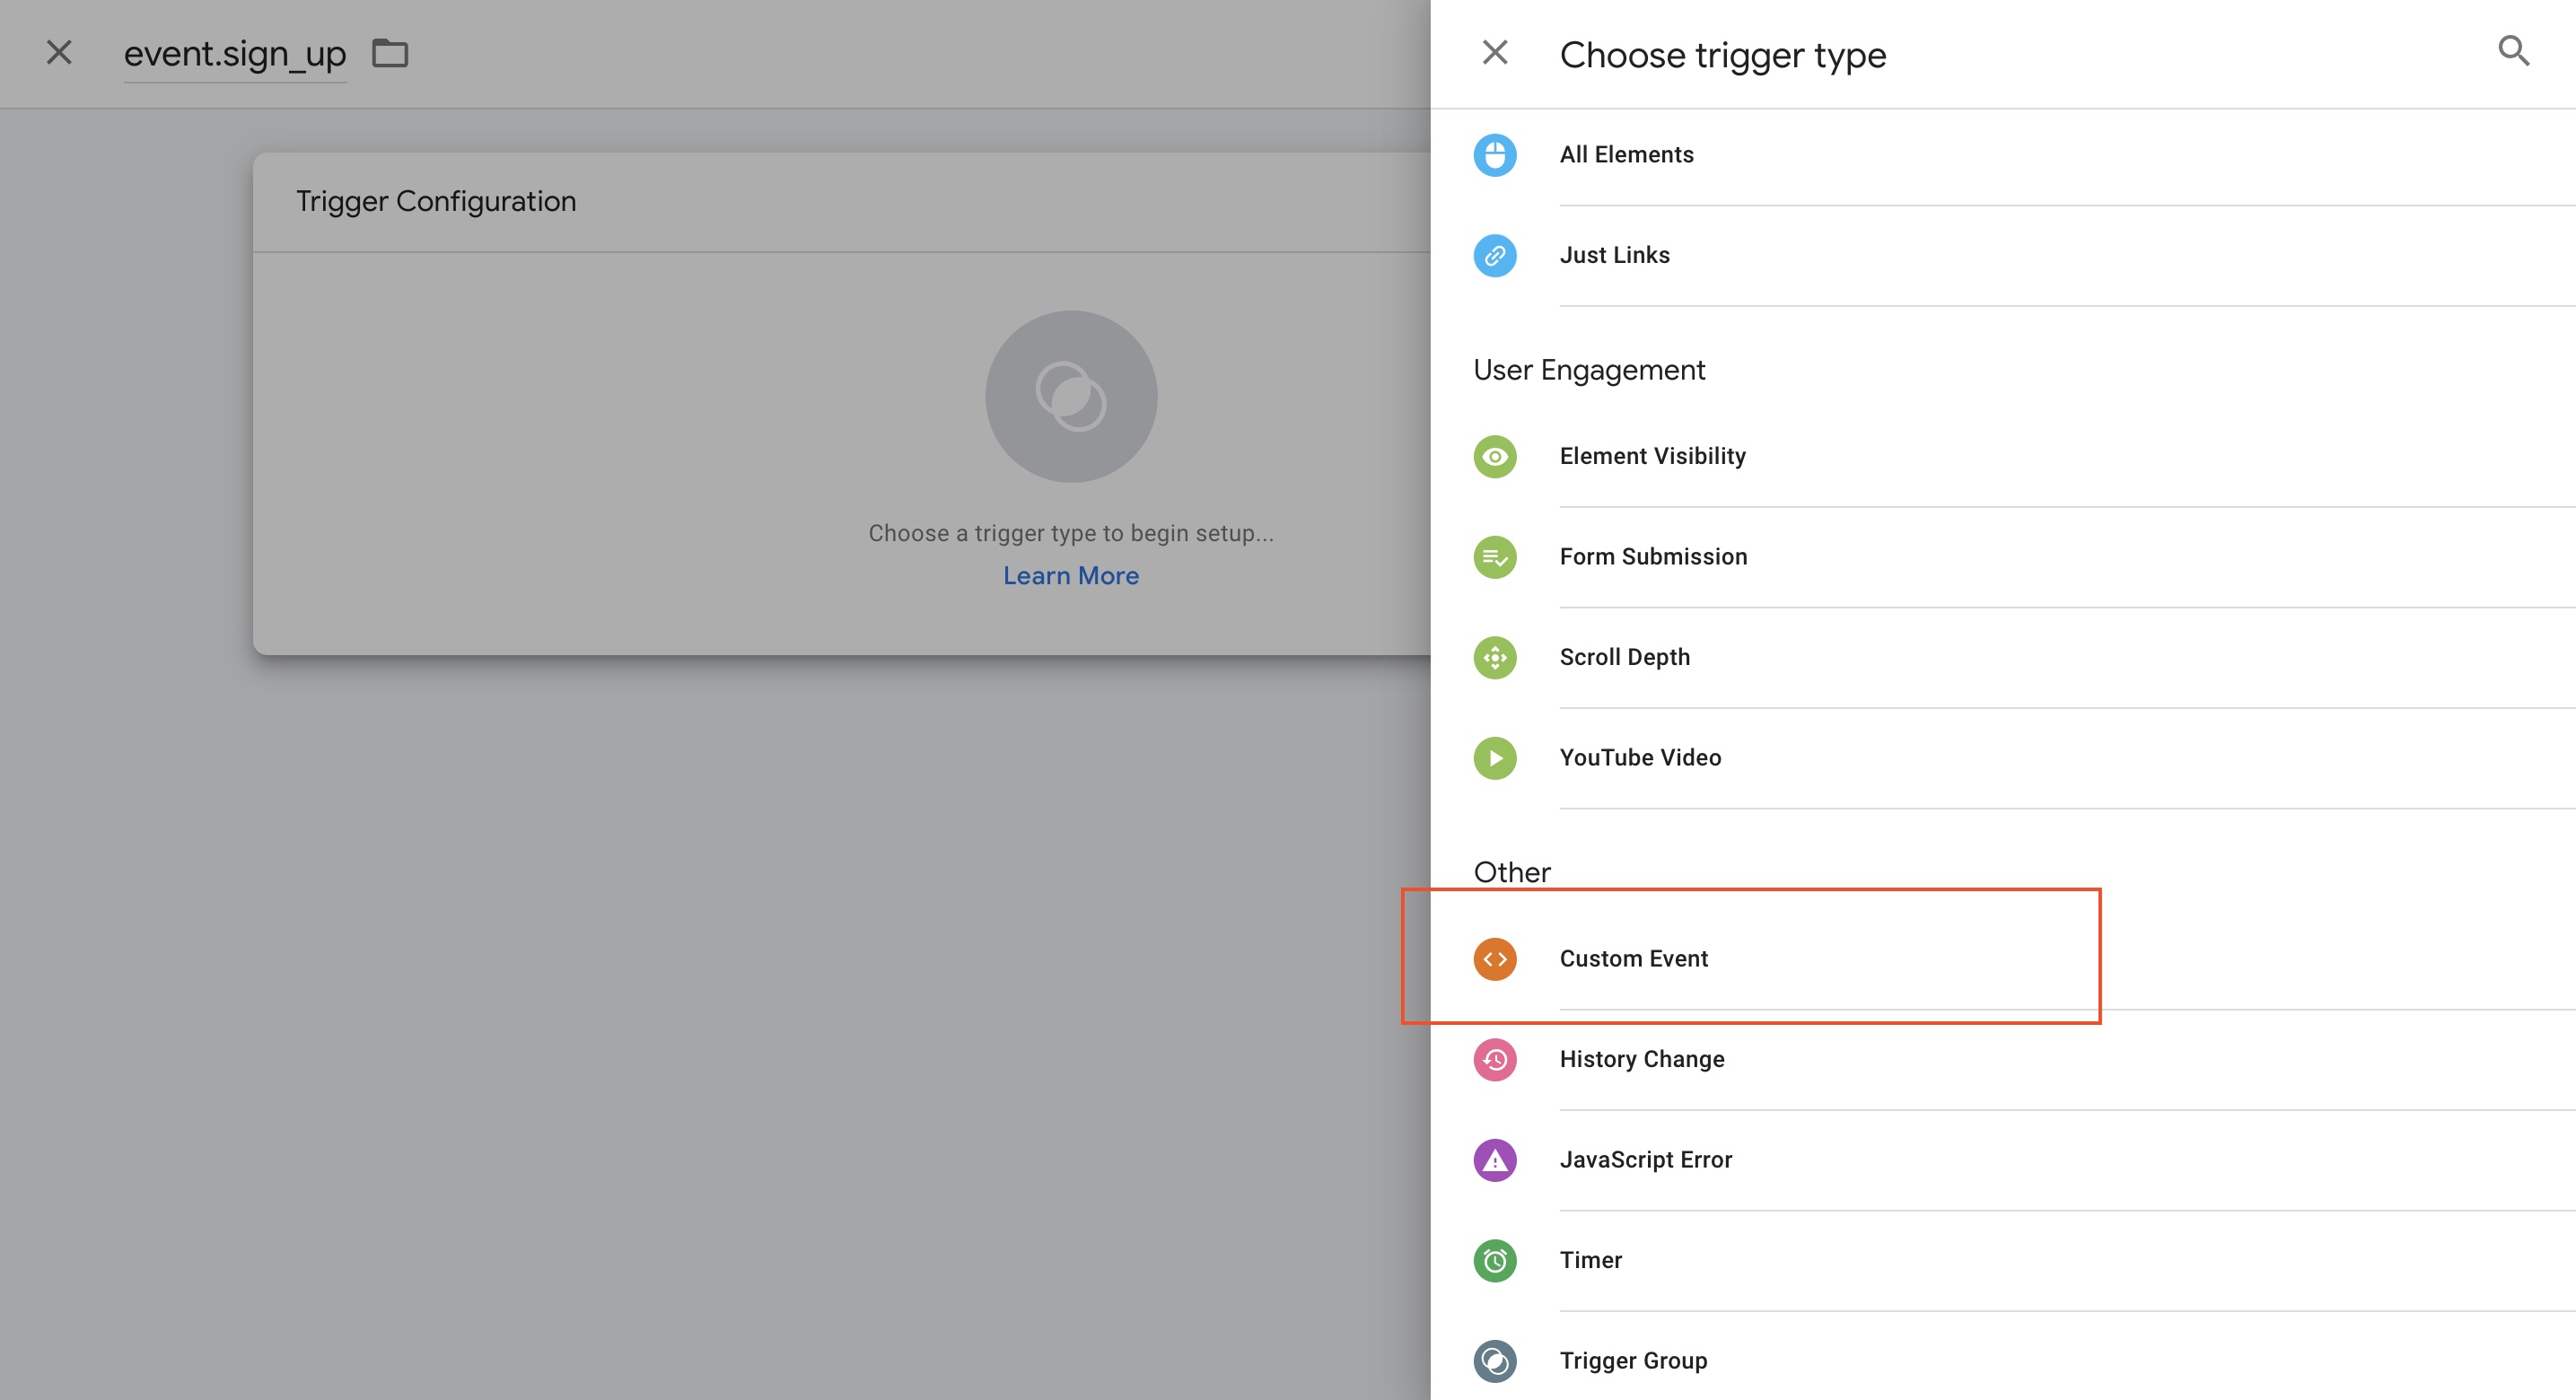
Click into the empty Trigger Configuration box to select a trigger type and chose “Custom Event” here:
In the “Event name” box, enter the exact name of your dataLayer event, i. e. the value of the event attribute. In our example here, that’s still sign_up.
Make sure to save the trigger so we can continue to the last part, the Google Analytics tag.
The Google Analytics 4 tag(s)
The trigger tells Google Tag Manager to react to our dataLayer event, now we only need a tag to tell it what to do.
GA4 Configuration tag
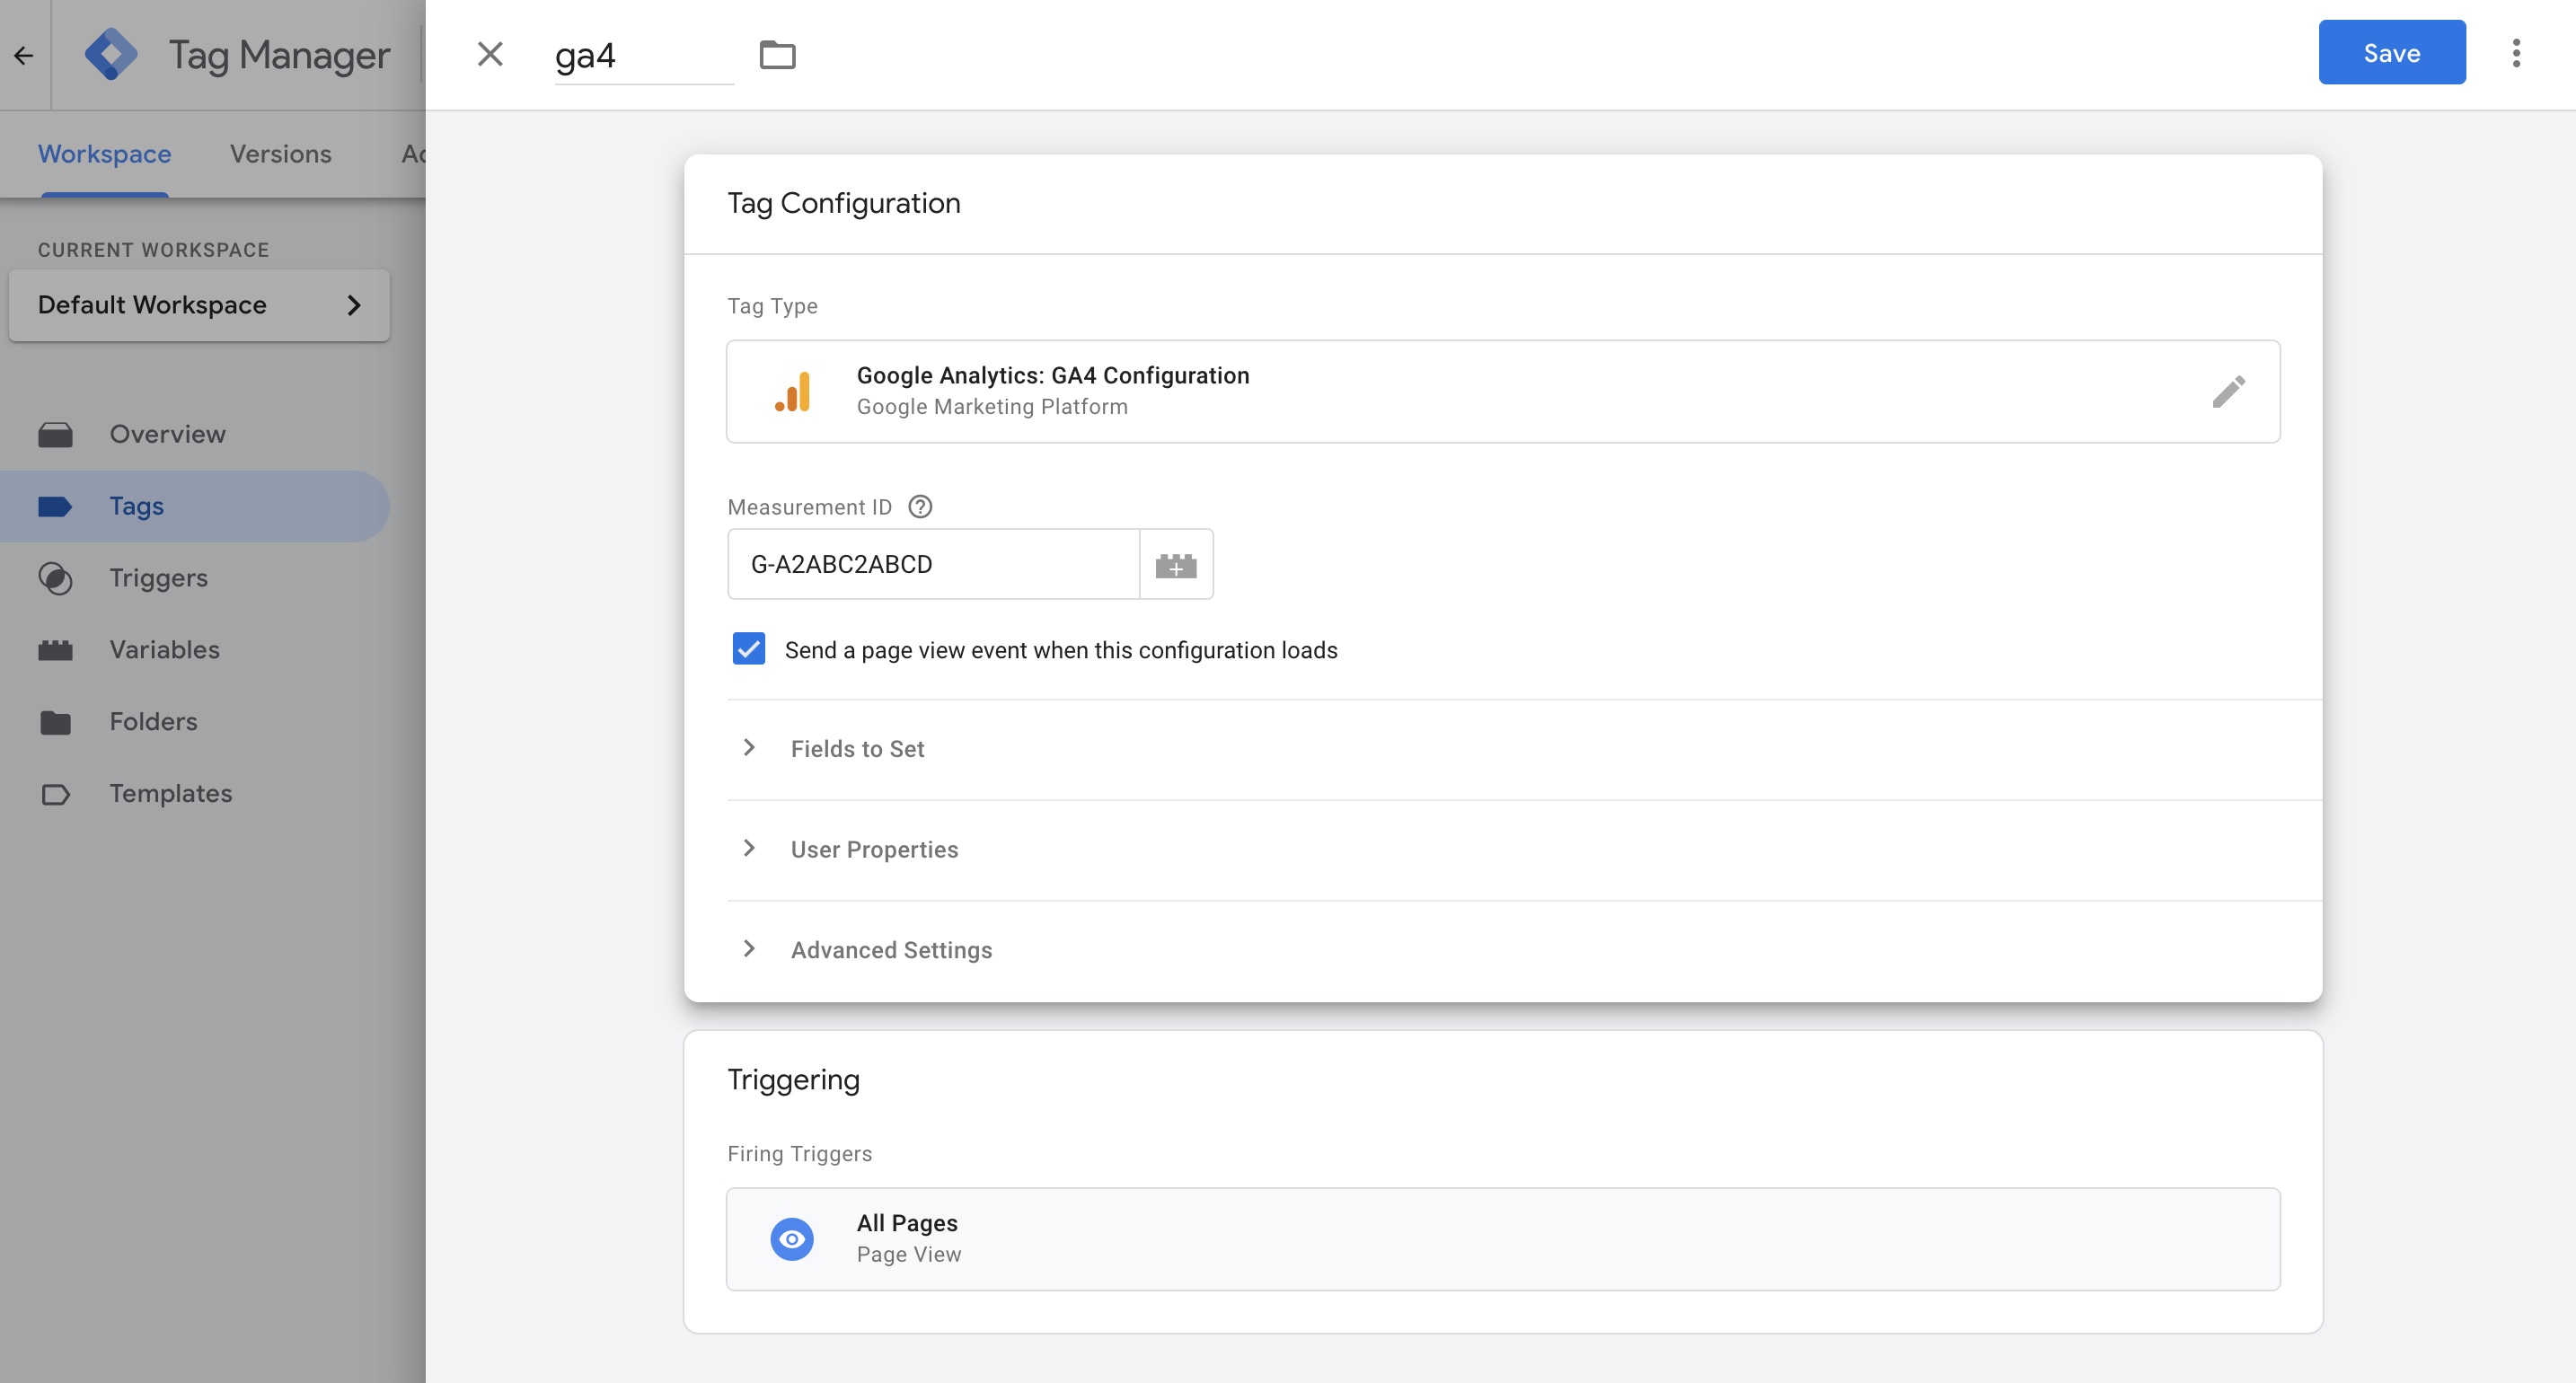
I’m assuming you already have a basic GA4 implementation in your GTM container that tracks pageviews.
If you don’t, then
- Create a tag of the “GA4 Configuration” type
- Enter your Measurement ID
- Add the “All Pages” trigger to fire it every time a page loads
- Save it as “ga4”, for example
GA4 Event tag
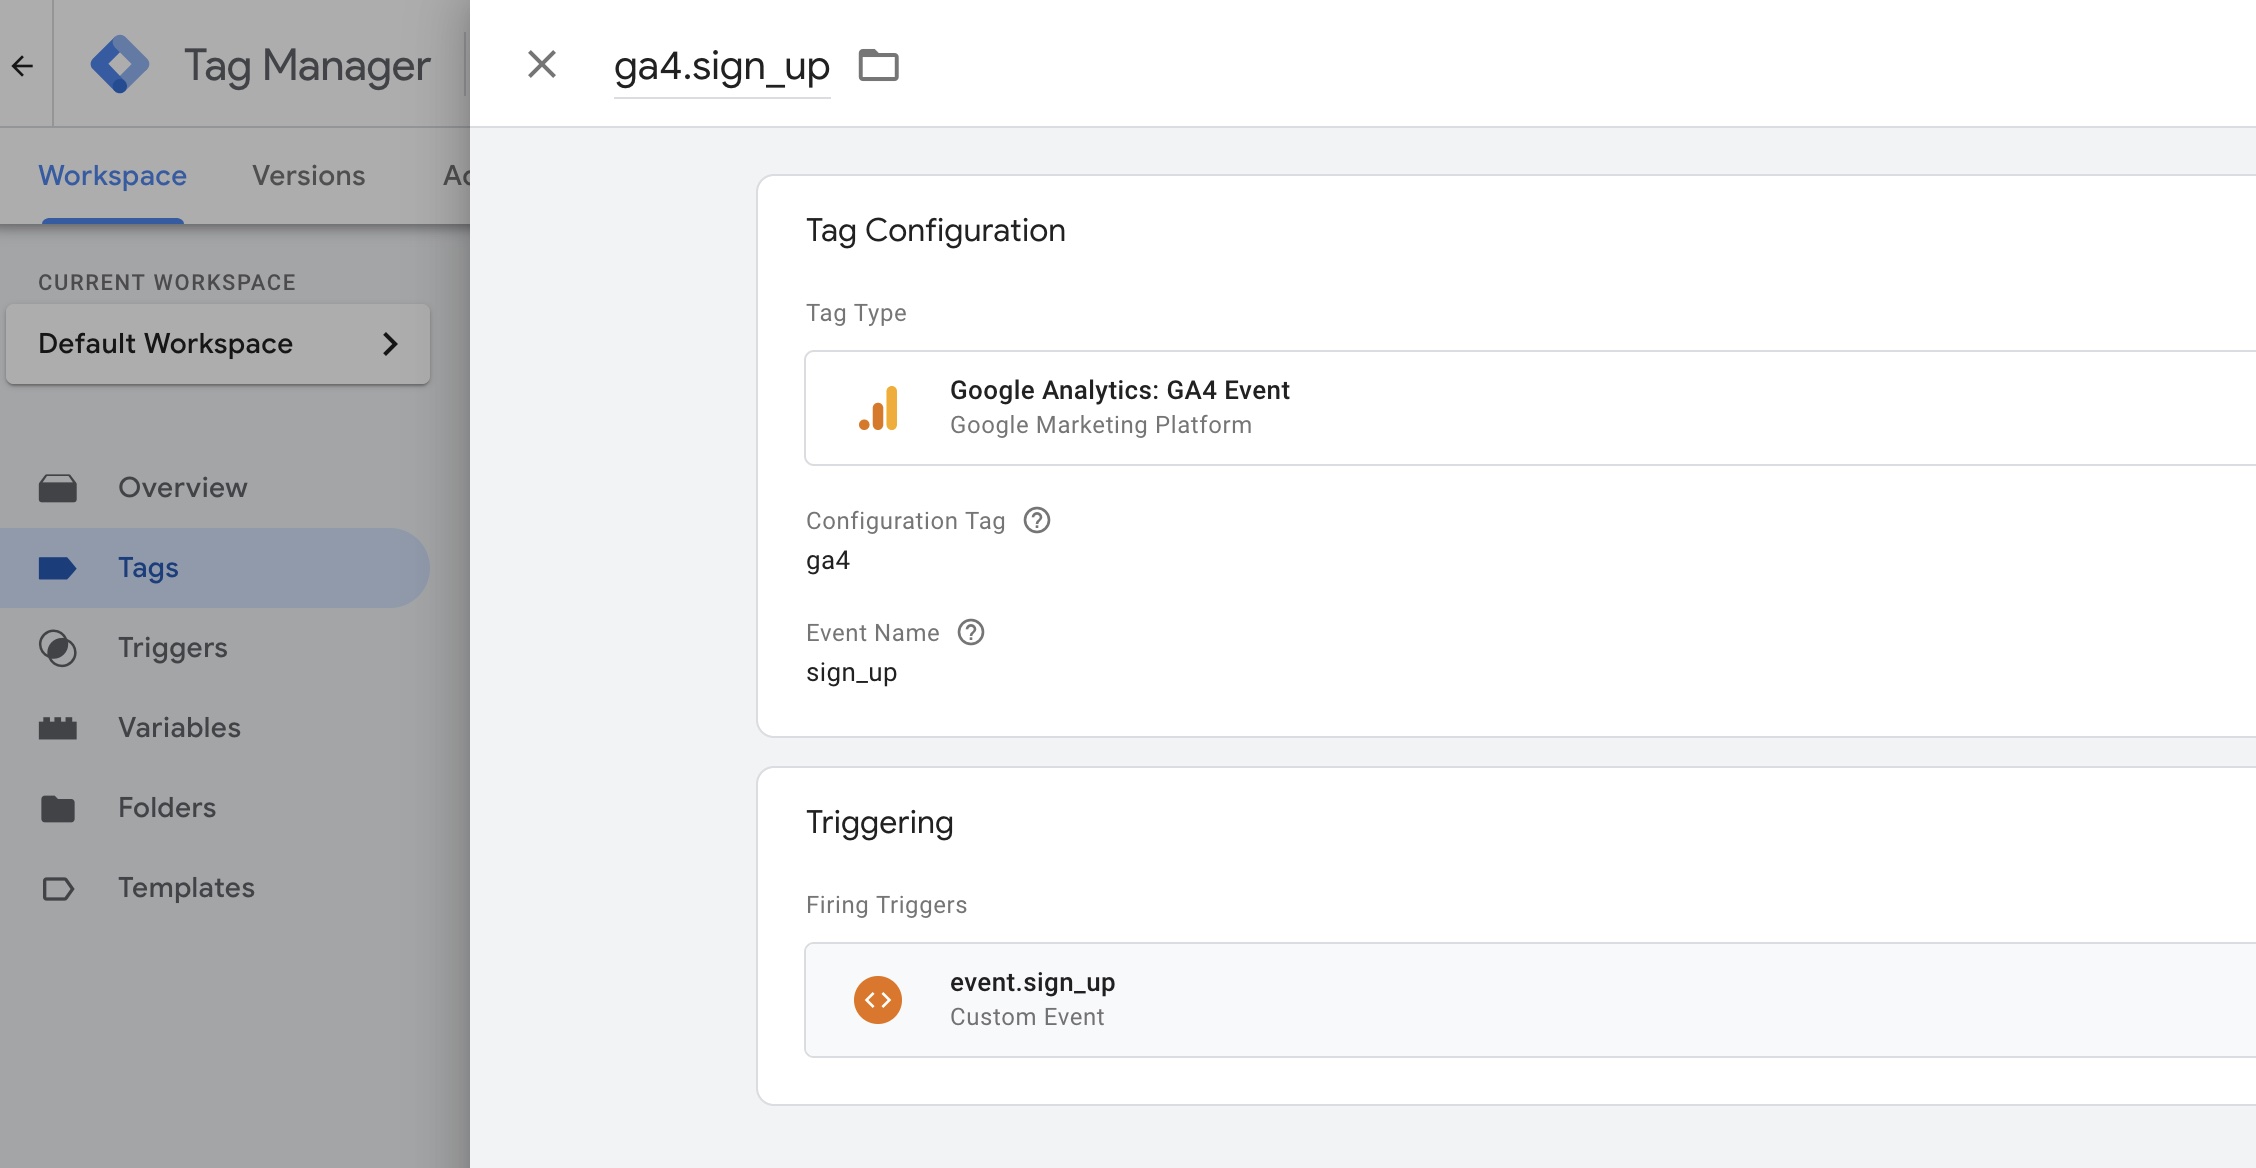
To actually send your event to GA4, create a tag of the type “GA4 Event” that will be dedicated to the sign_up event.
- Select your GA4 Configuration tag (in my example above I simply called that one “ga4”)
- Enter the event name you’d like to show up in GA4. Gere you don’t have to use the same name as the one in dataLayer, you could also use something else like
registrationif you’ve changed your mind since the dataLayer event was implemented. For consistency I’d recommend sticking to one name though. - Attach the trigger you just created for your event so GTM knows when to fire the tag.
In the end it should look like this:
Bonus step: Custom event parameters
In our dataLayer event we not only named the event but also added some additional information: email_newsletter:
window.dataLayer = window.dataLayer || []
window.dataLayer.push({
    event: "sign_up",
    email_newsletter: true   // <--------
})
If you want to send this kind of additional information to GA4 as a parameter of the event, you first need to create a dataLayer variable to allow GTM to access the email_newsletter attribute.
Go to the “Variables” section in Google Tag Manager and create a new variable of the type “Data Layer Variable”.
In the “Data Layer Variable Name” field, put in the name of the attribute exactly as it shows up in your dataLayer event:
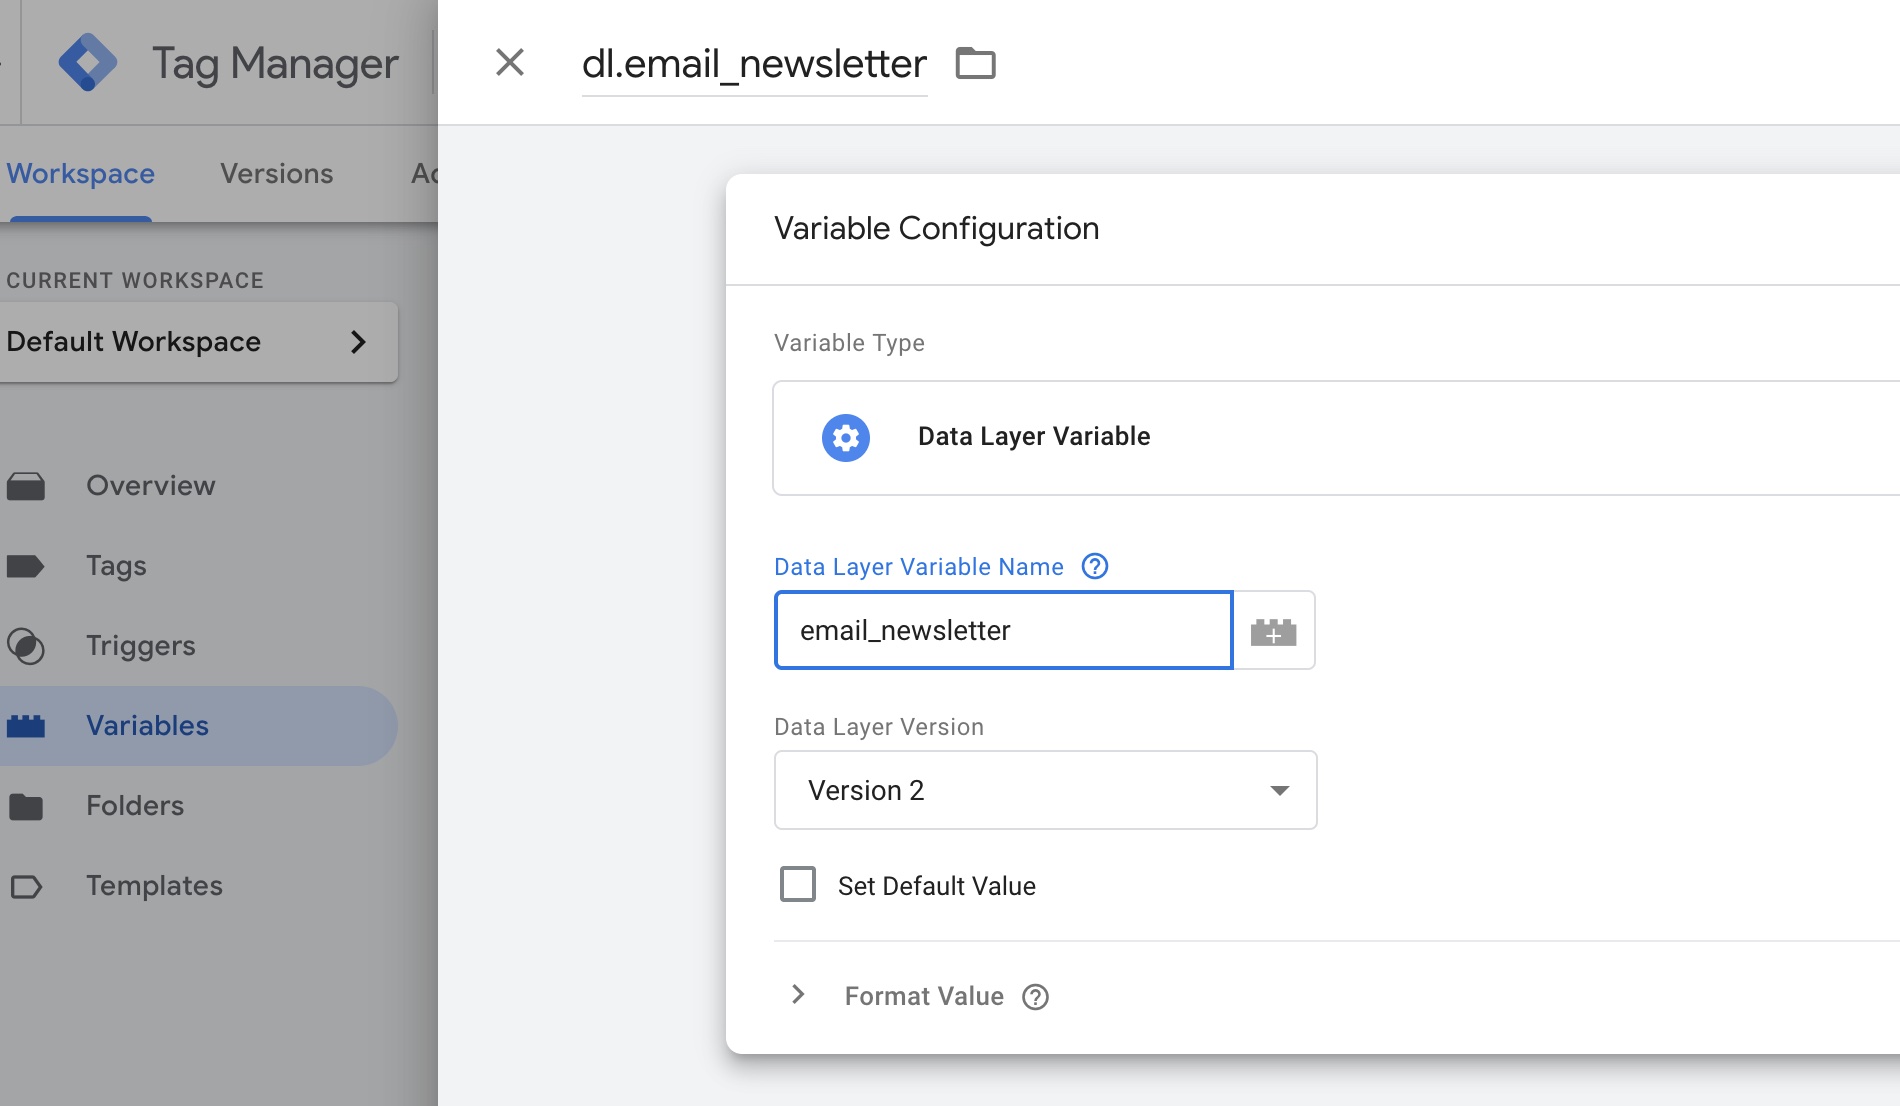
After saving the variable, e. g. as dl.email_newsletter, go back to your GA4 event tag to add it as a parameter.
Again, the GA4 parameter doesn’t have to have the same name as the dataLayer variable, but it’s practical.
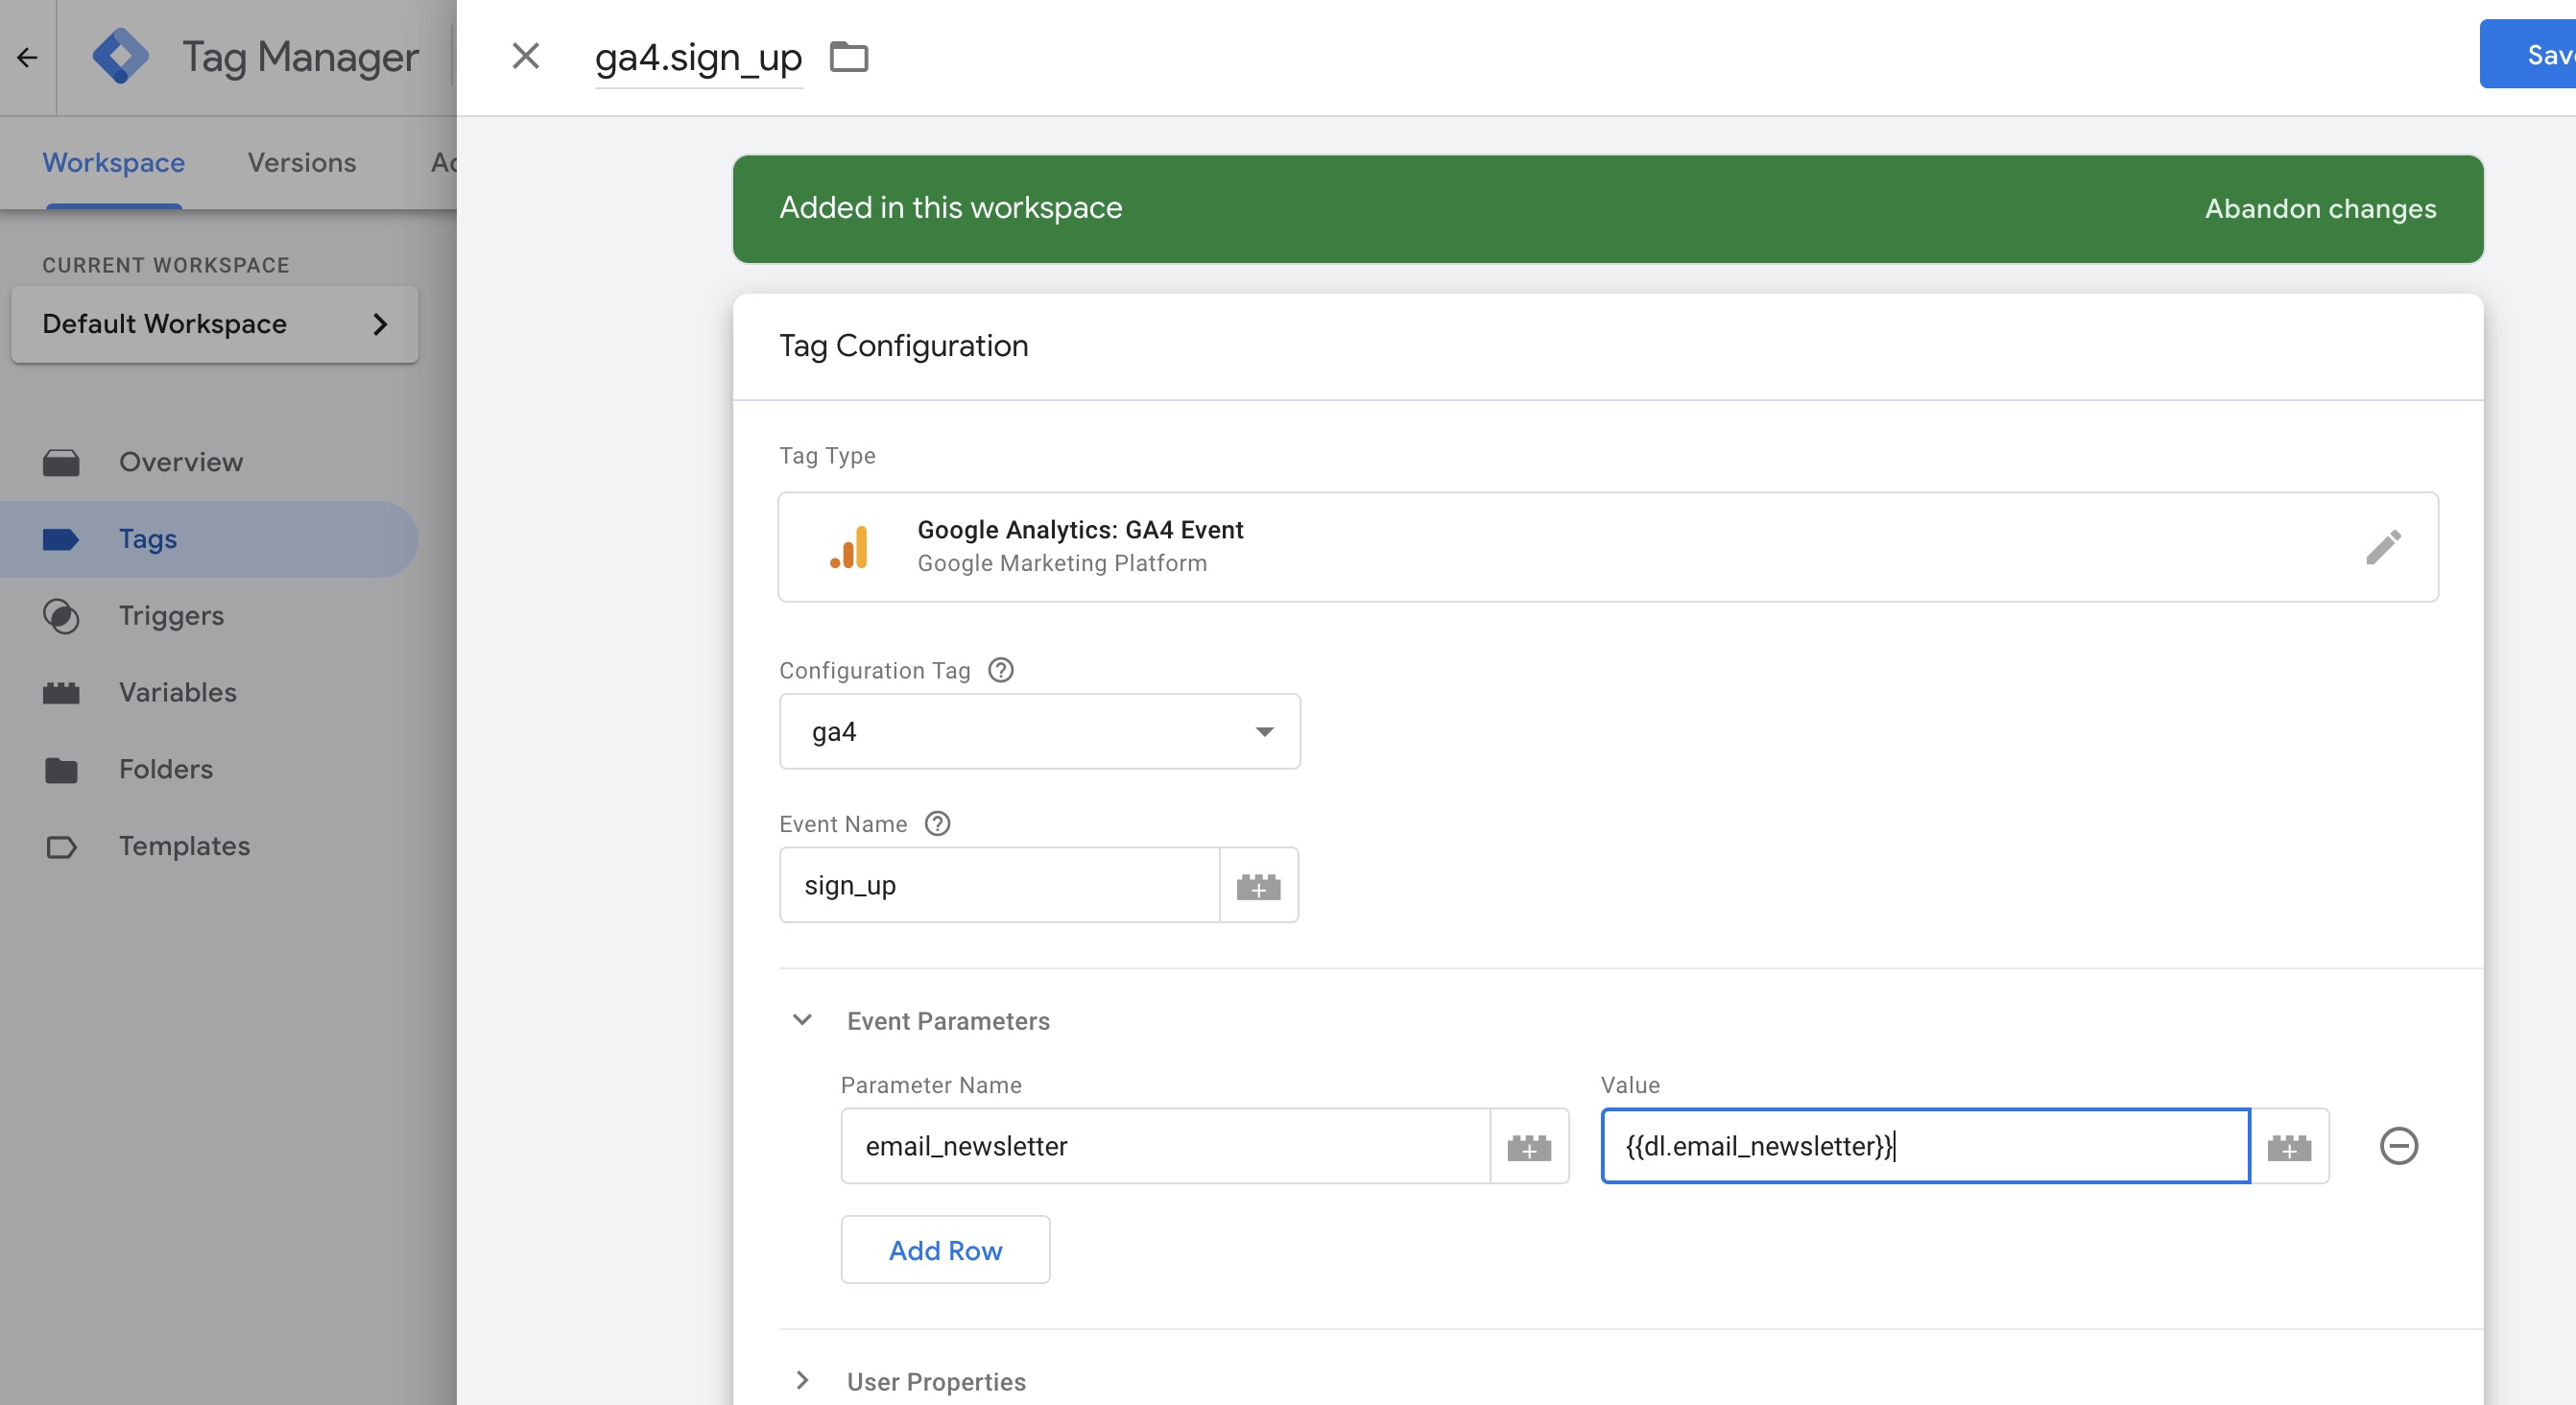
And that’s it!
You can now update GTM’s preview mode, do a test conversion on your site and see for yourself in GA4 if the event shows up.
Then don’t forget to publish your container to apply the changes for your live users and watch the data coming in :)
Become a Server Side Tagging Pro with owntag
Take control of your digital data collection with Server Side Tagging and Server Side GTM – easily hosted with owntag.
