Documentation Fundamentals

Getting Started

Step 1: Create a Container on Google

Regardless of where you host your Server Side GTM (Google Tag Manager) container, you always need a container in your Google Tag Manager account. There, you configure your tags, triggers, and variables regardless of hosting.
In Step 2, you will start hosting via owntag.

Before you can start hosting your Server Side GTM container with owntag, you must create a container in your Google Tag Manager account.
If you have done this before and your SGTM container already exists, you can continue to use it without creating a new one, unless you want to start with a new one.

Go to tagmanager.google.com and log in with your Google account.
Then click the ‘Create Container’ button:
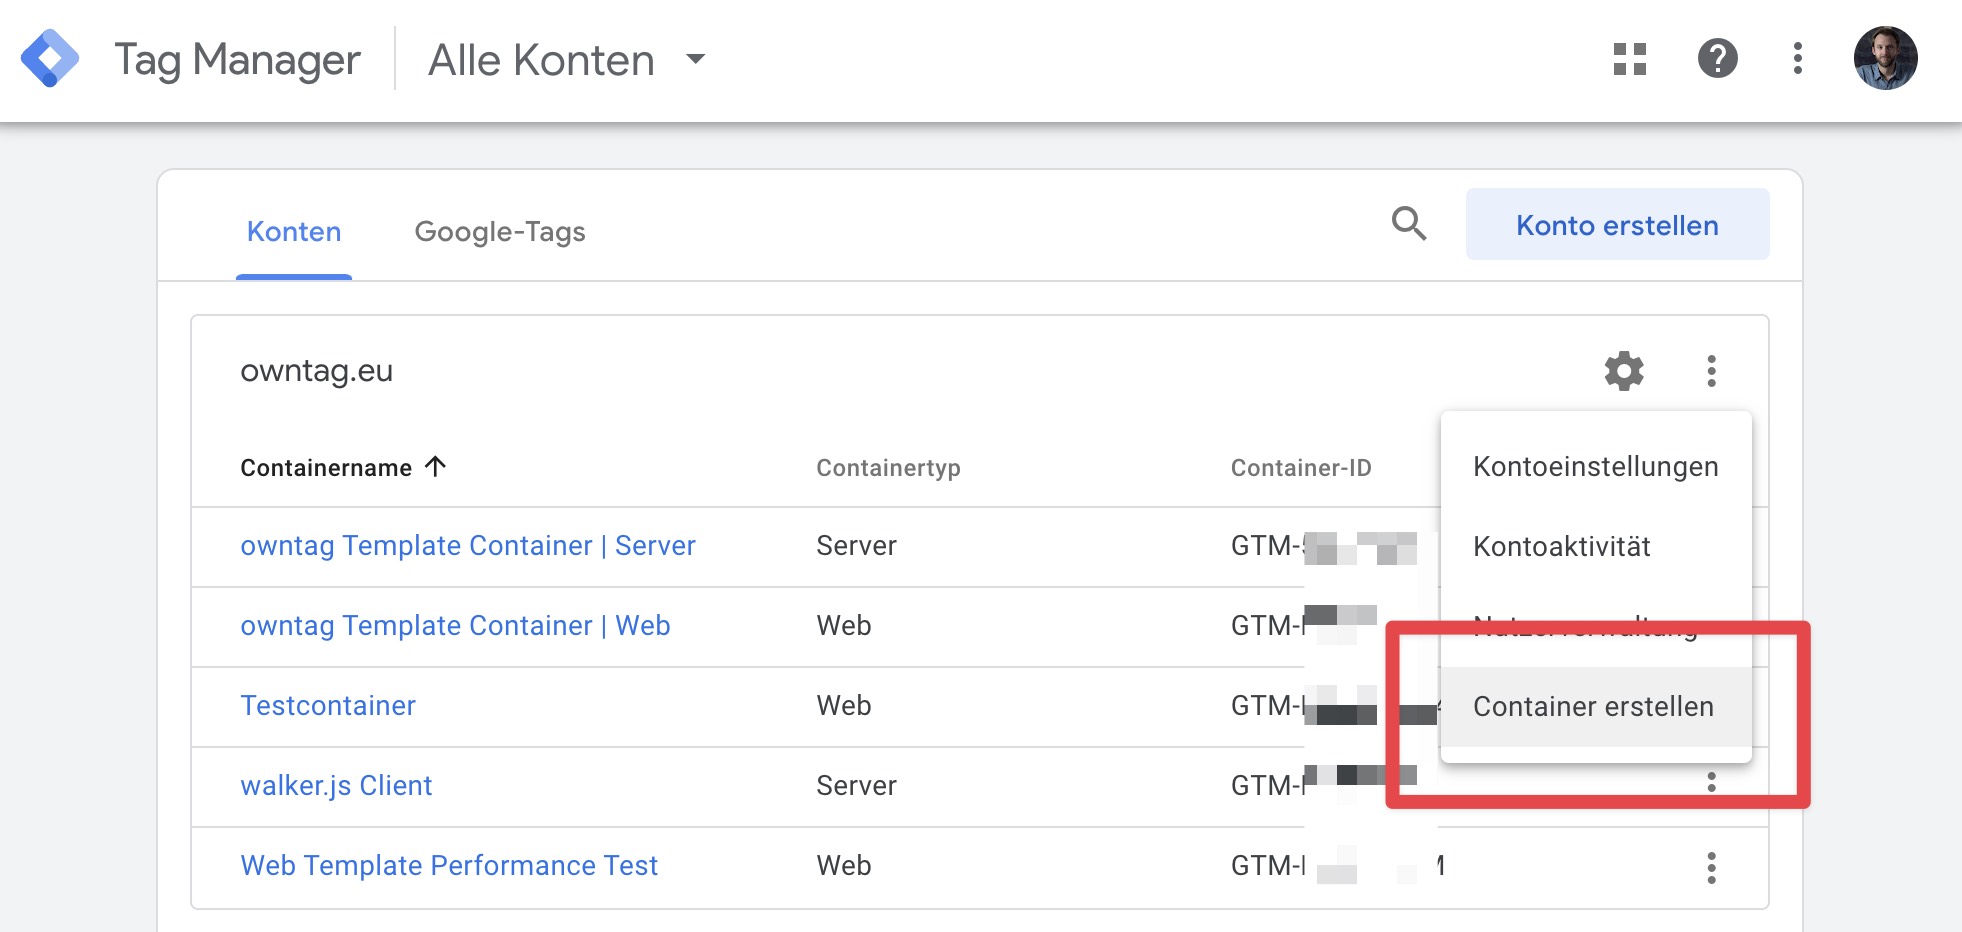
Screenshot of the Google Tag Manager account and the container overview list highlighting the 'Create Container' button

In the subsequent container type selection, choose ‘Server’ and confirm by clicking the ‘Create’ button:
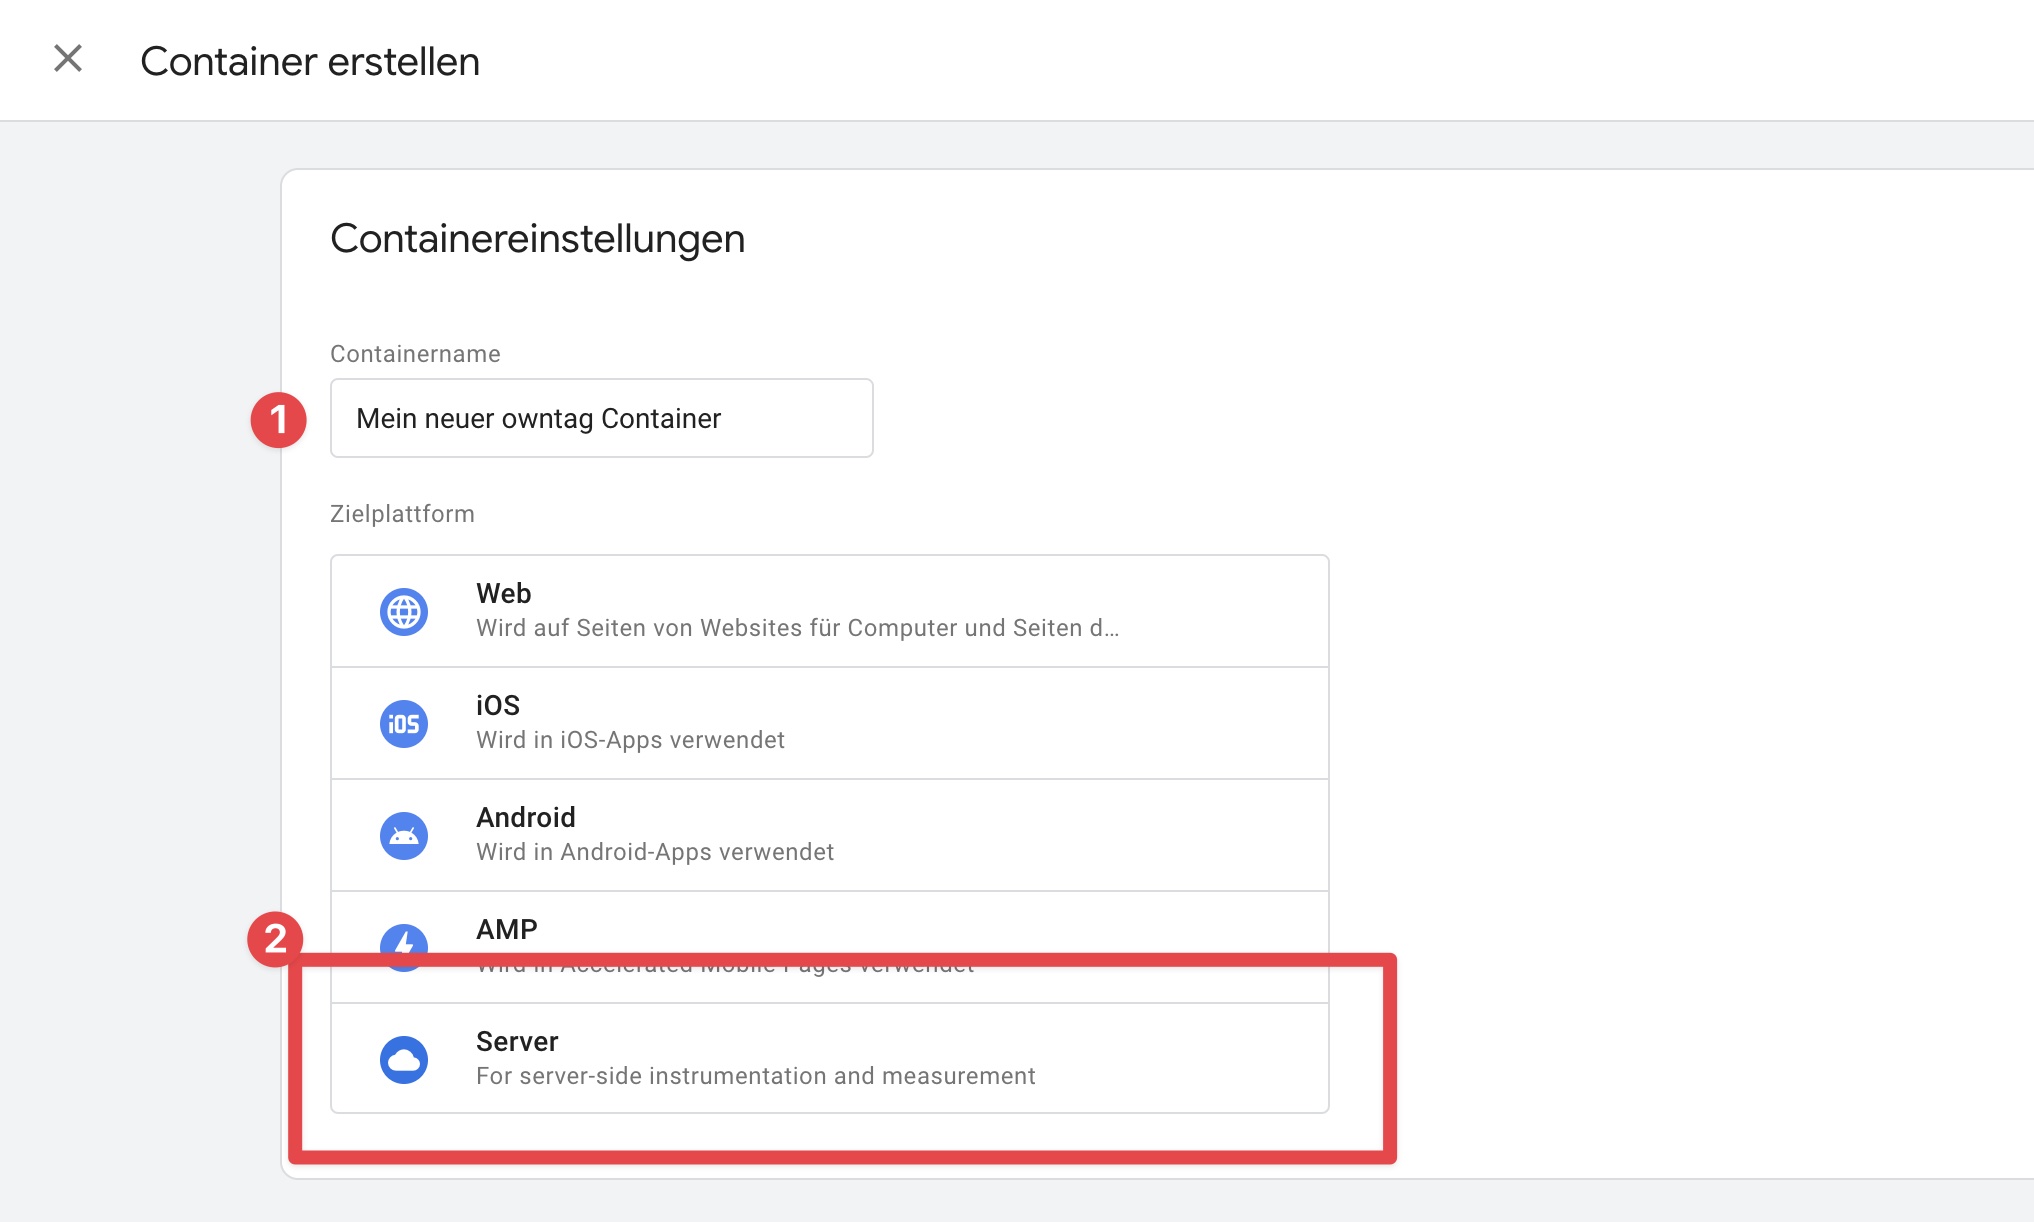
Screenshot of the Google Tag Manager interface when creating a container. In the 'Container Settings' section, 'My new owntag Container' is entered as the container name. Below are options for the target platform: Web, iOS, Android, AMP, and Server, with the 'Server' option for server-side instrumentation and measurement outlined in red, indicating it has been selected or highlighted.

Your Server Side GTM container is now created, and a popup will appear. In the popup, select the option “Manually deploy tagging server.” You will then see the so-called ‘Container Configuration.’
Copy this 64-character string to enter it next into owntag.
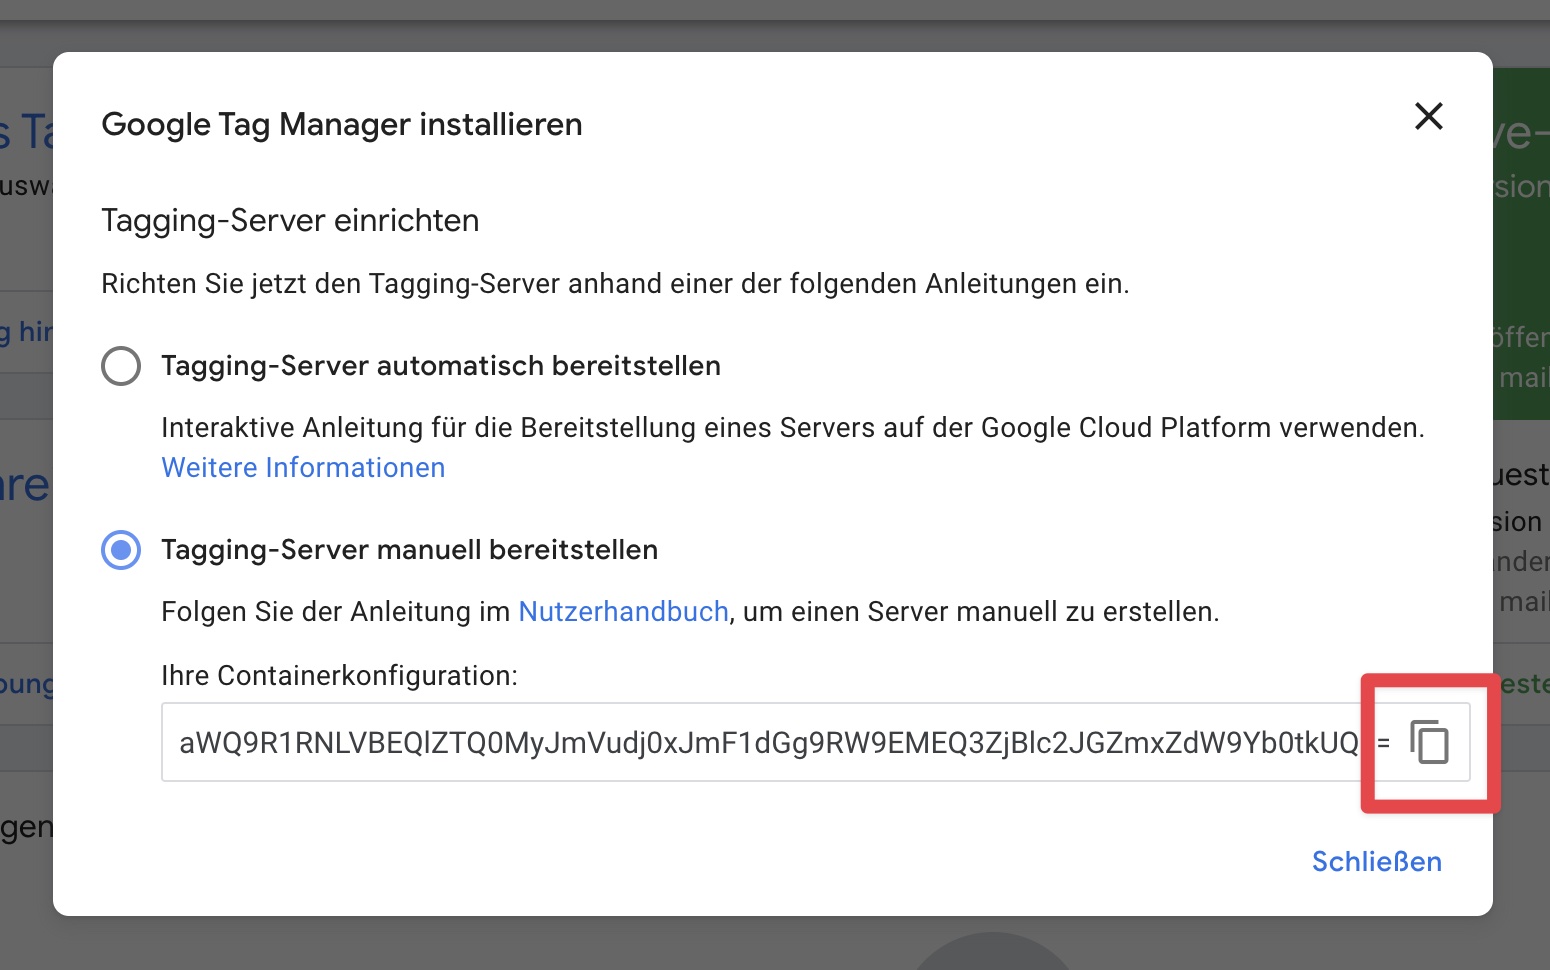
Screenshot of the 'Install Google Tag Manager' dialog with options for setting up a tagging server. There are two options: 'Automatically deploy tagging server' with a subtext describing an interactive guide for deployment on the Google Cloud Platform, and 'Manually deploy tagging server,' followed by a prompt to follow the user manual to manually create the server. Below, a container configuration is displayed with a long alphanumeric code. A close button is at the bottom of the dialog.

Step 2: Host Container on owntag

Log in to owntag at console.owntag.eu.
There you will immediately find the “Create Container” button:
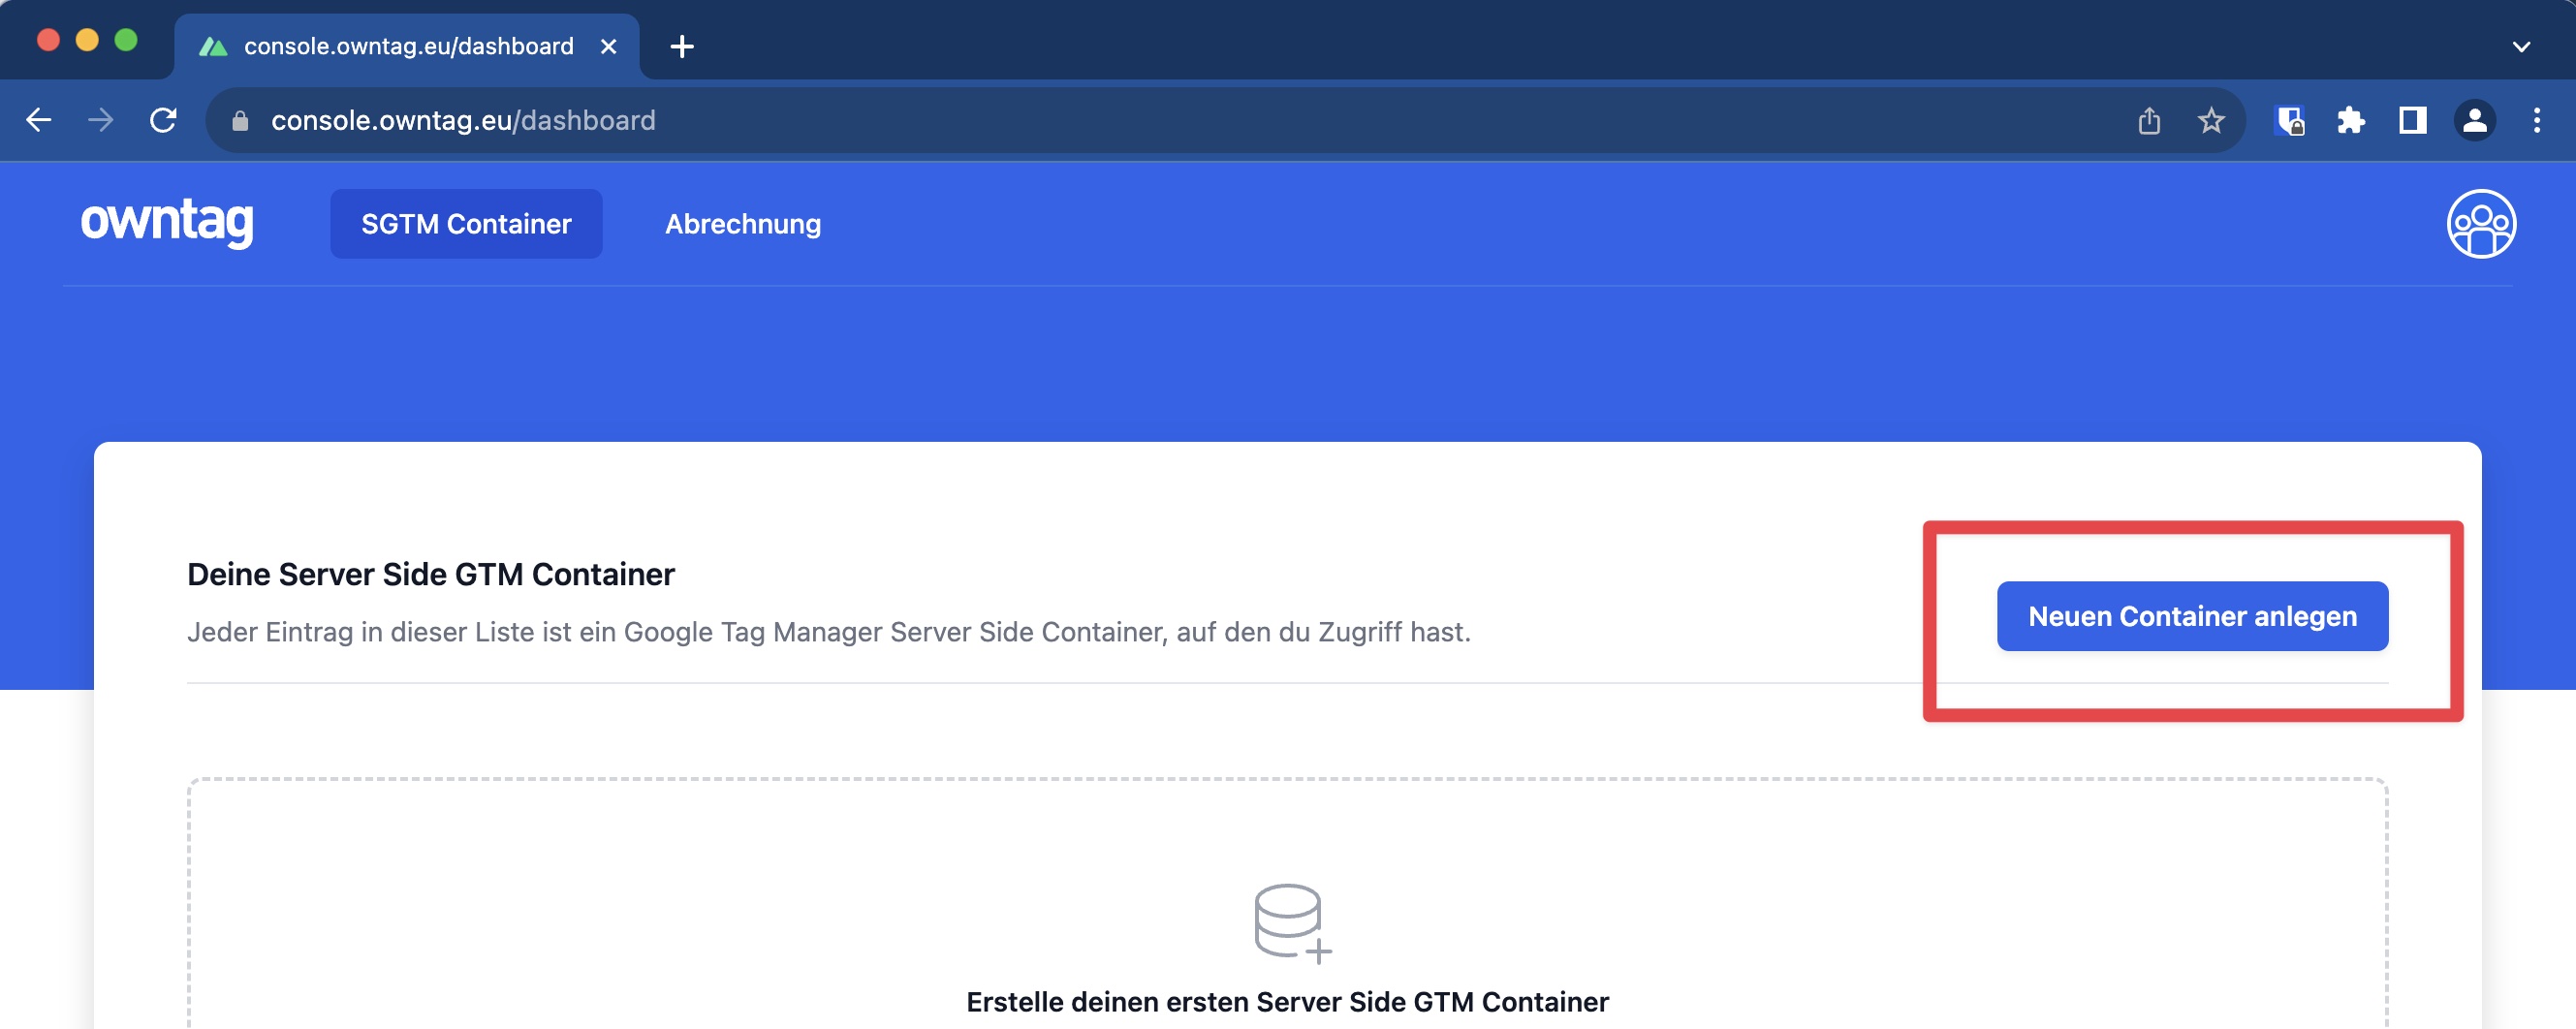
Screenshot of the 'owntag' web interface with a blue header showing options 'SGTM Container' and 'Billing'. In the main part of the page, 'Your Server Side GTM Containers' is displayed, and each entry in the list is a Google Tag Manager Server Side Container that you have access to. A red frame highlights the blue 'Create New Container' button at the bottom right corner.

As part of the container creation, you now need to insert the Container Configuration from Step 1 into owntag:
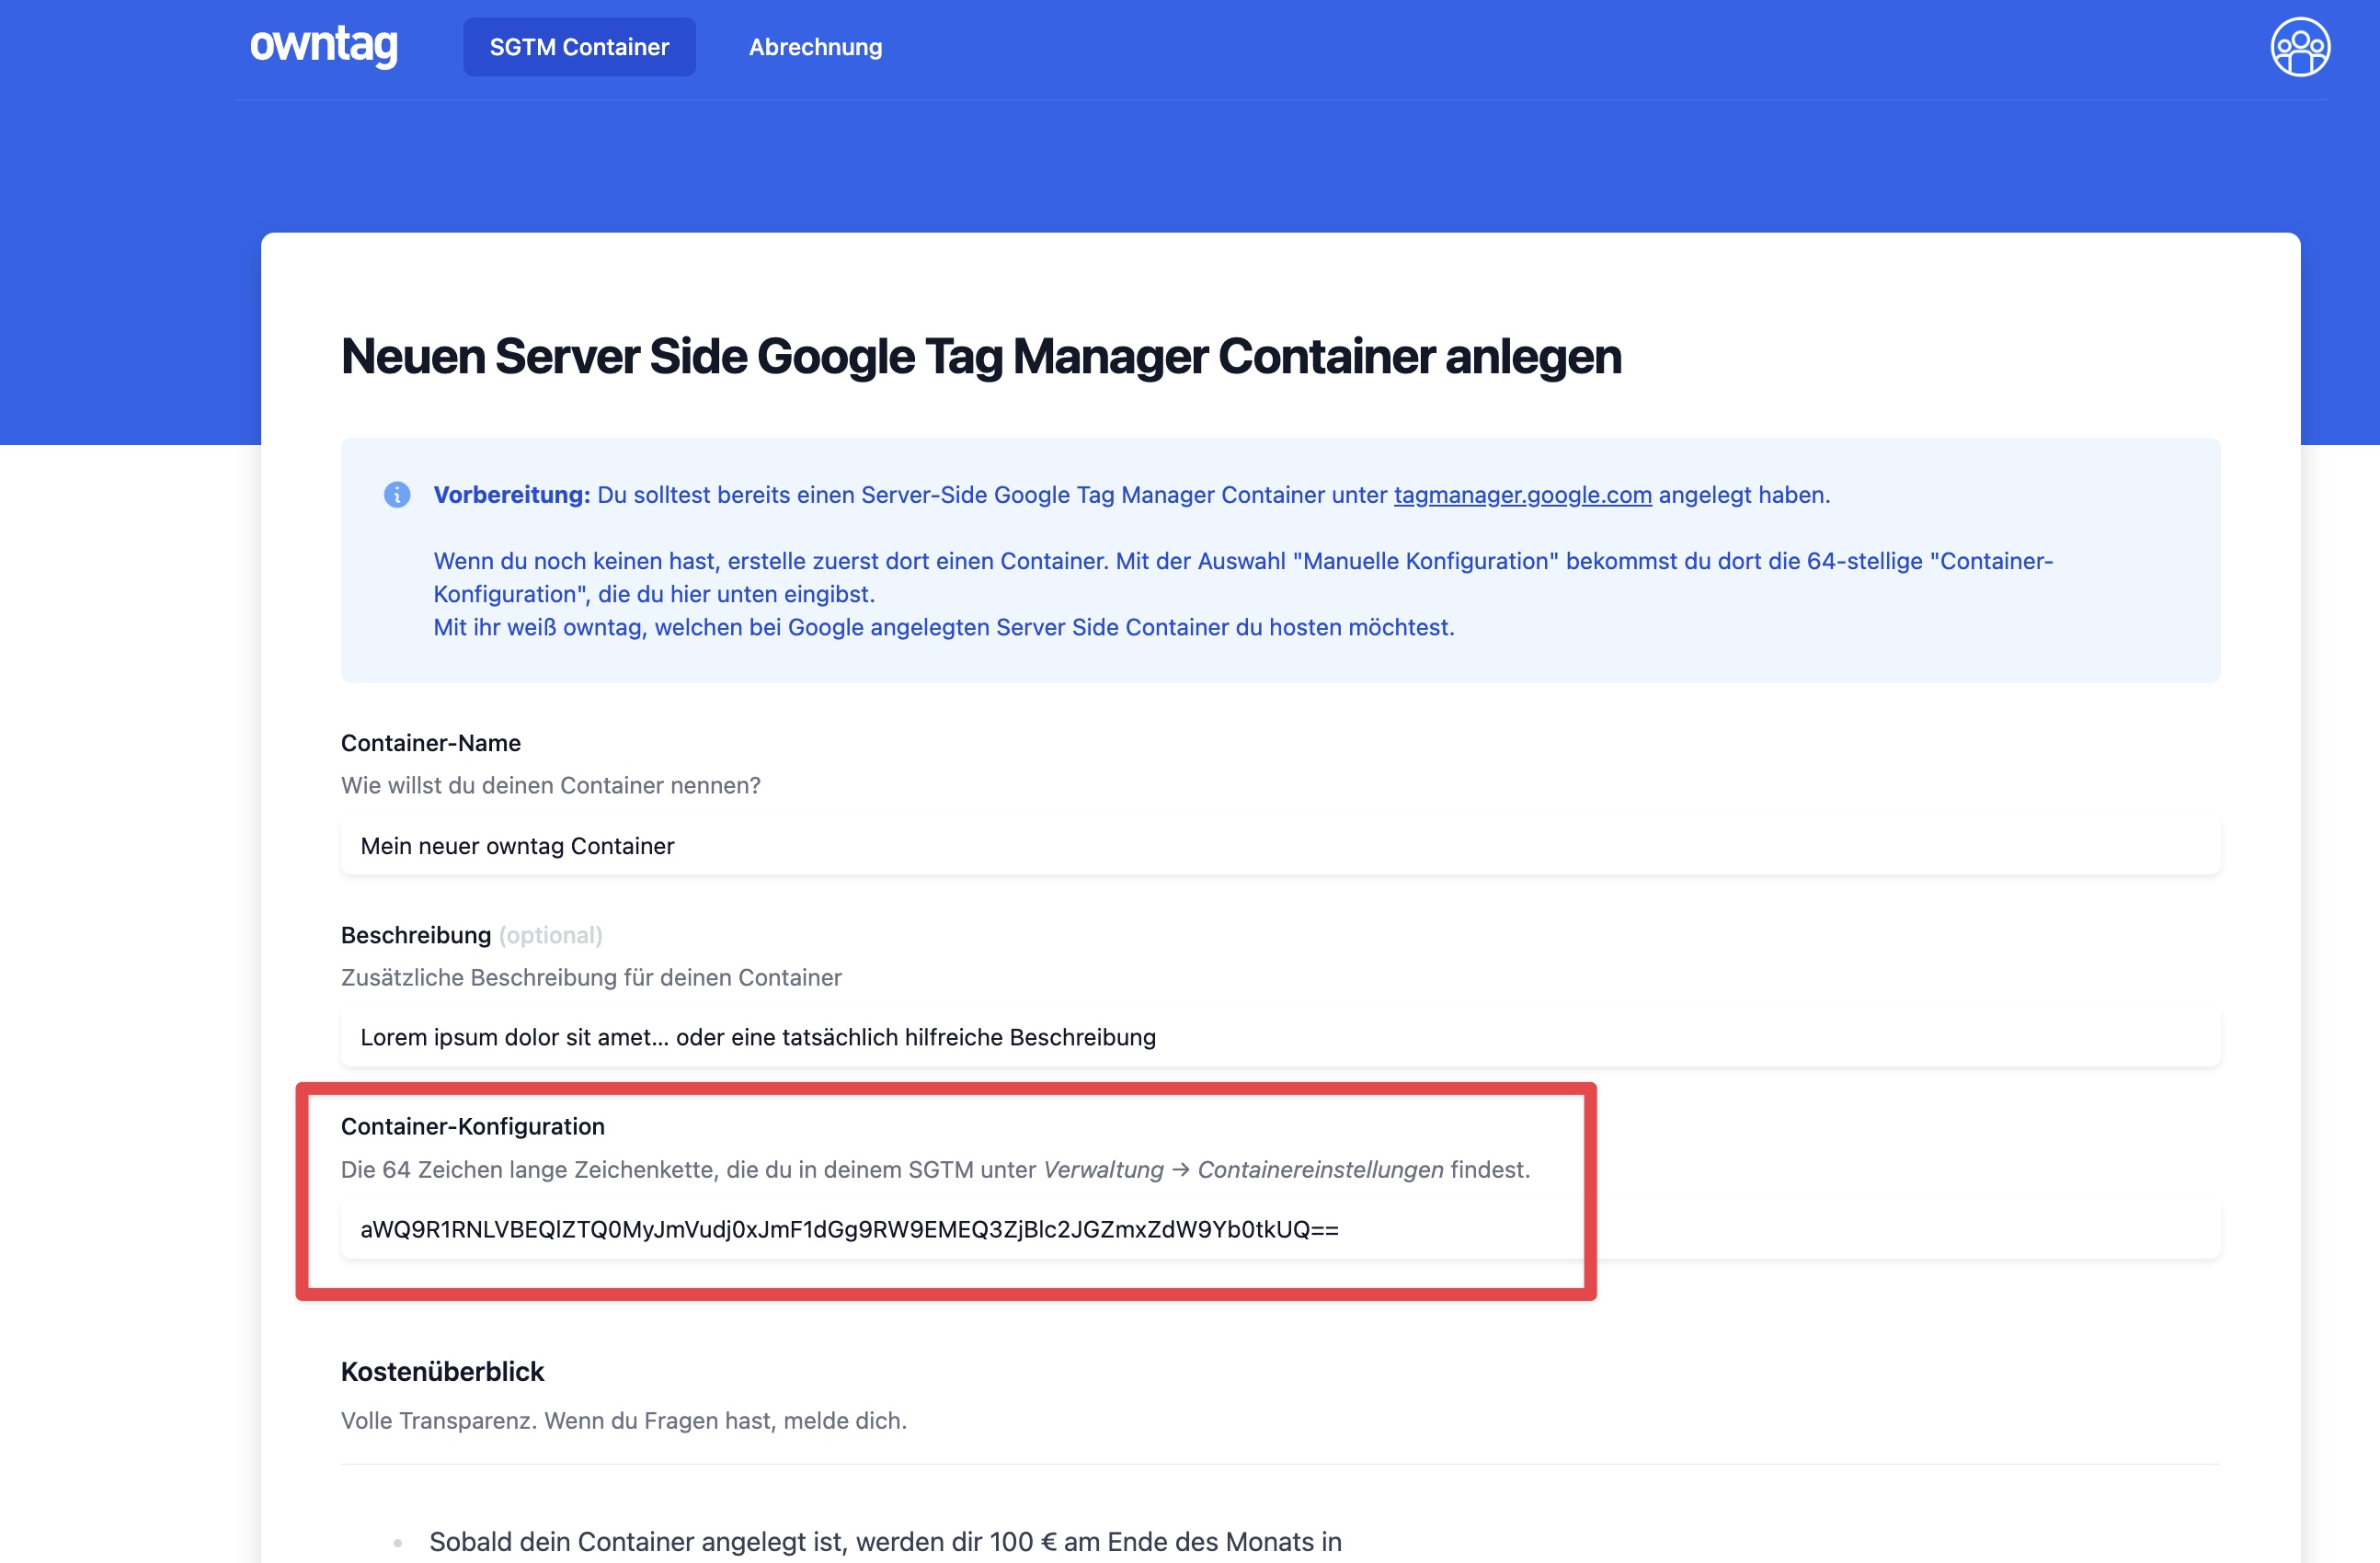
Screenshot of the 'owntag' website for creating a new Server Side Google Tag Manager Container. The upper part contains instructions for preparation, noting that one should first create a Server-Side Google Tag Manager Container at tagmanager.google.com. Under 'Container Name,' 'My new owntag Container' is entered as an example. A section 'Container Configuration' is outlined in red and displays a 64-character string to be inserted into SGTM under 'Administration' → 'Container Settings.' Additional information about costs and transparency can be found at the bottom of the page.

At the bottom of the form, you can then create the container, and your Server Side GTM setup is underway.
Congratulations!

To activate the preview mode, you can now enter the automatically created URL of your container in your Google Tag Manager account. It ends with .owndn.eu and might look something like this:

851984cc-b5a2-458s-8618-6bfa77f17fdf.owndn.eu

You can find it in the overview of your newly created container in the “Domains” section:
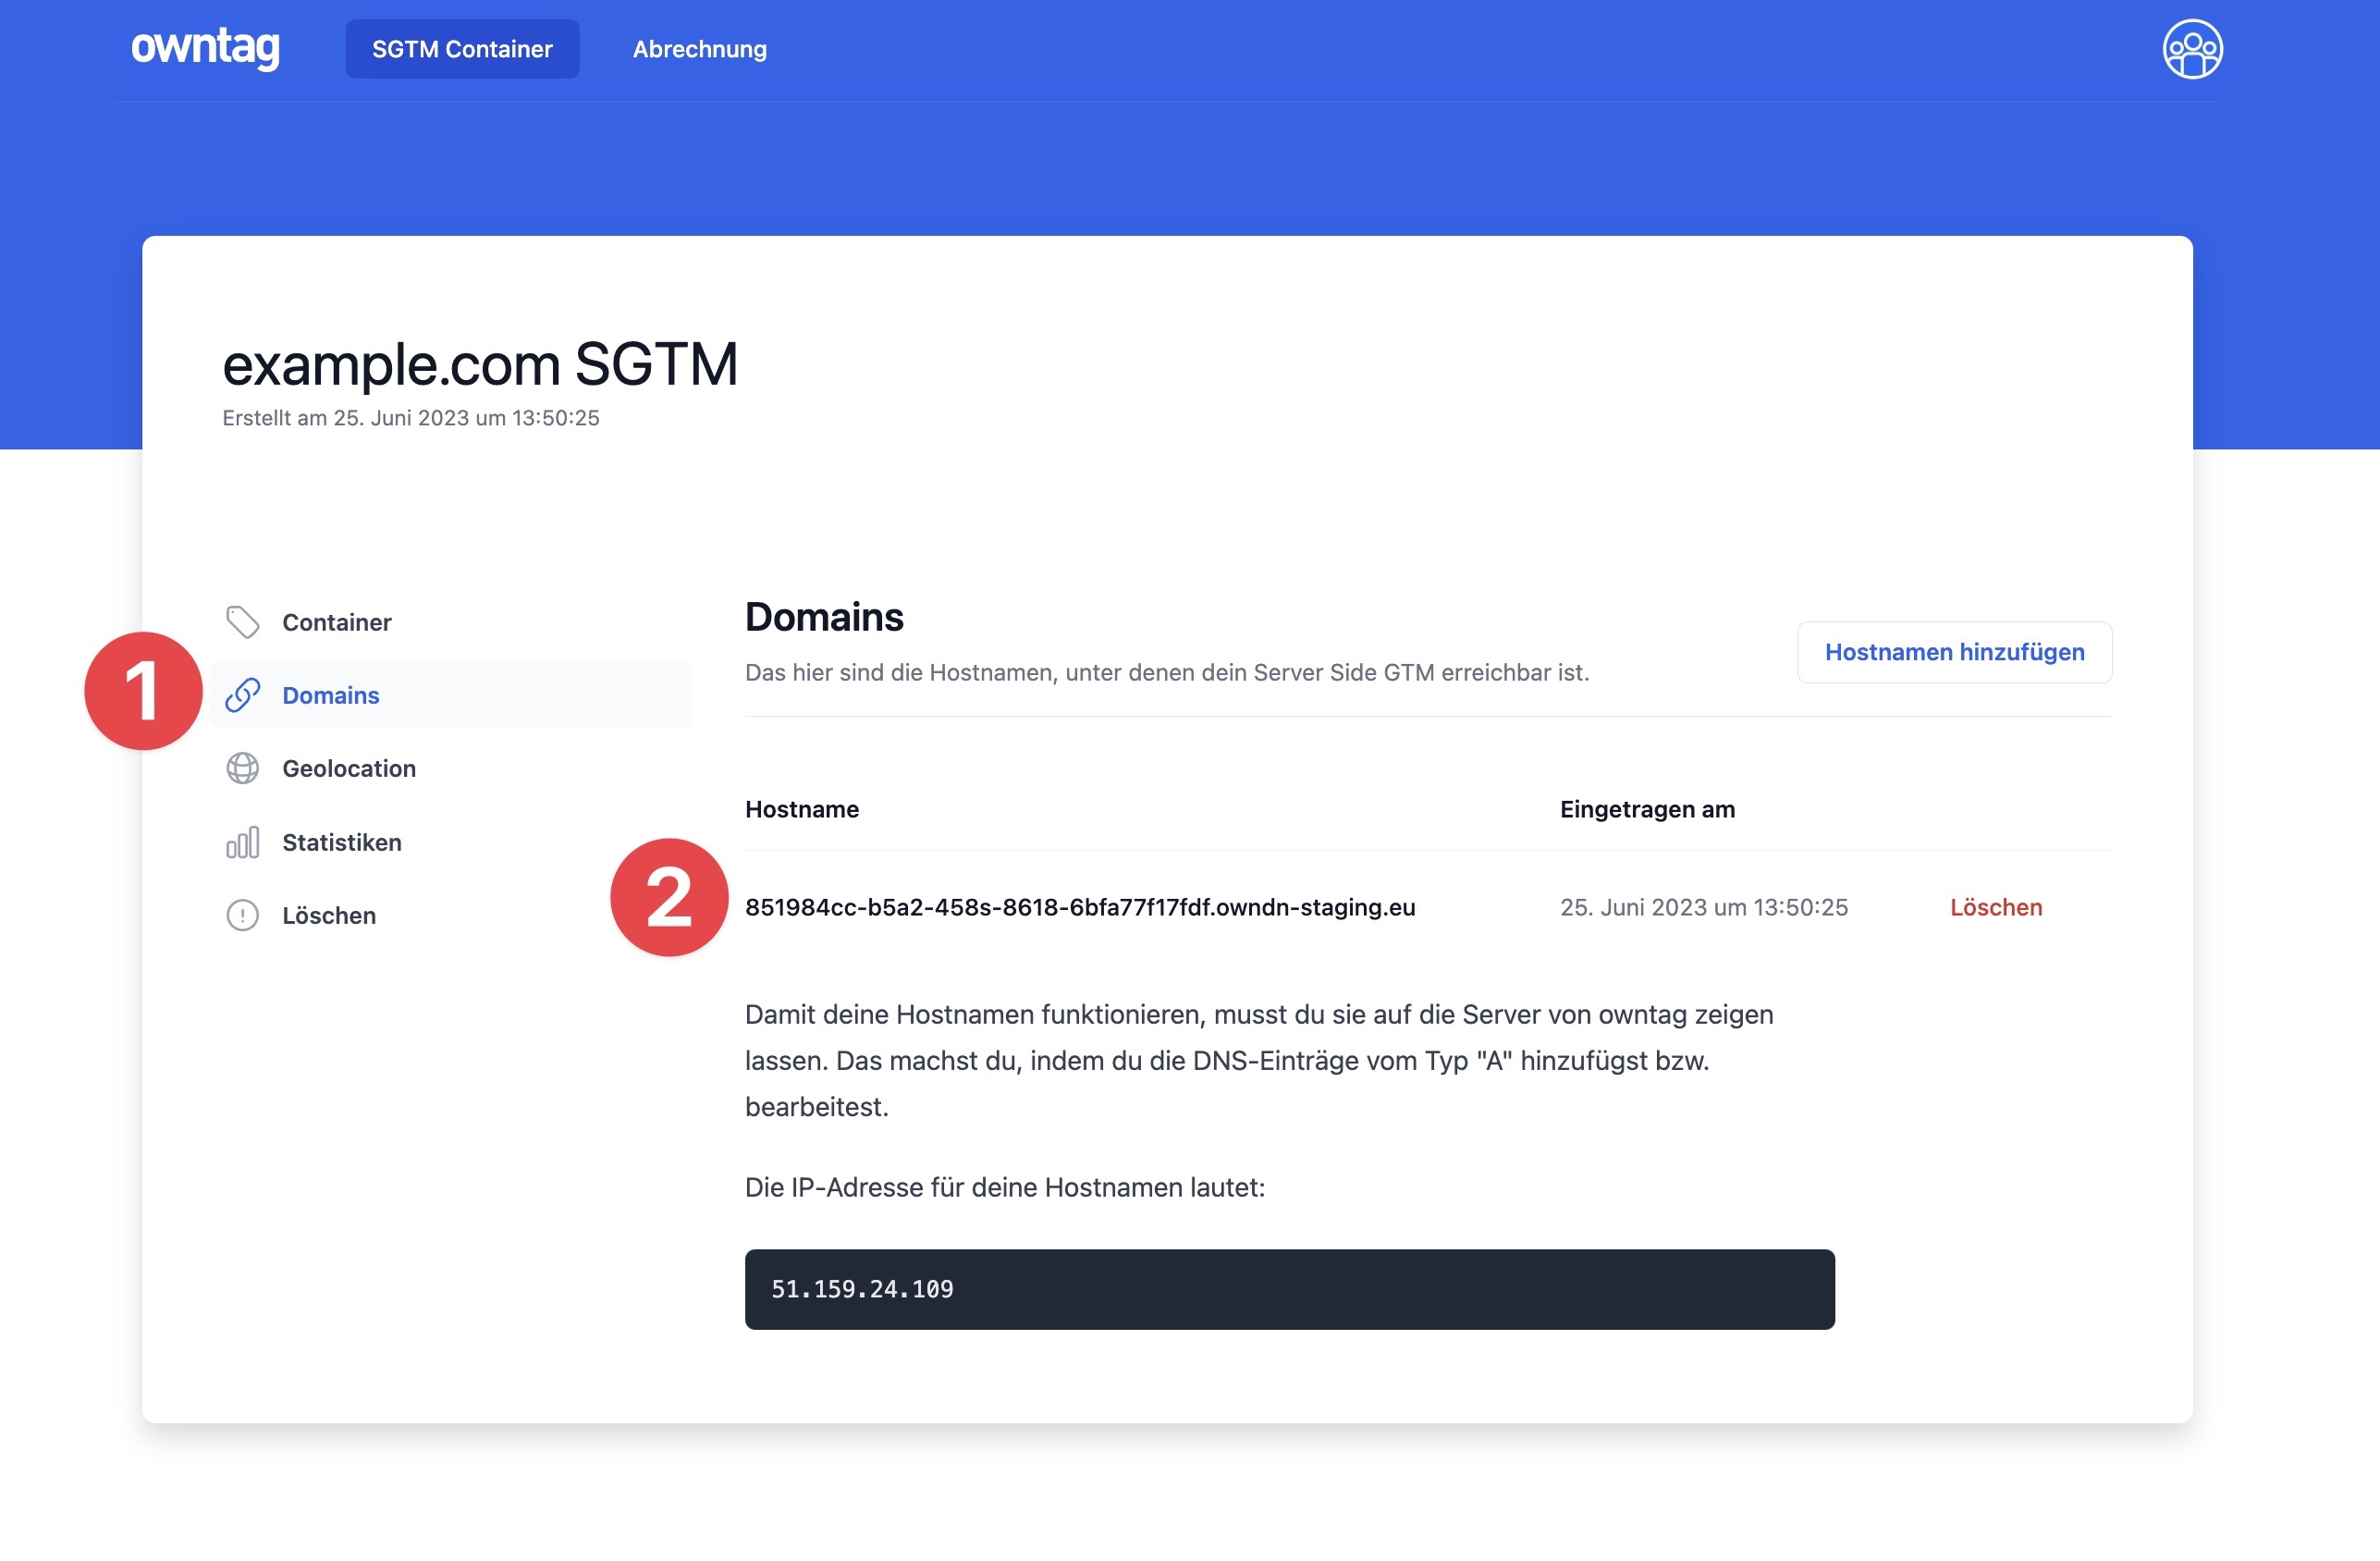
Interface of owntag showing domain settings for 'example.com SGTM'. The page lists a hostname that has been entered for the Server Side GTM Container, with the option to add more hostnames. Instructions for setting up the DNS entries and the associated IP address for the hostname are also displayed.

In the overview of your container at Google Tag Manager, you can find the settings for the preview mode under “Administration” → “Container Settings.”
Add a new “Server Container URL” and enter the .owndn.eu URL, preceded by https://:
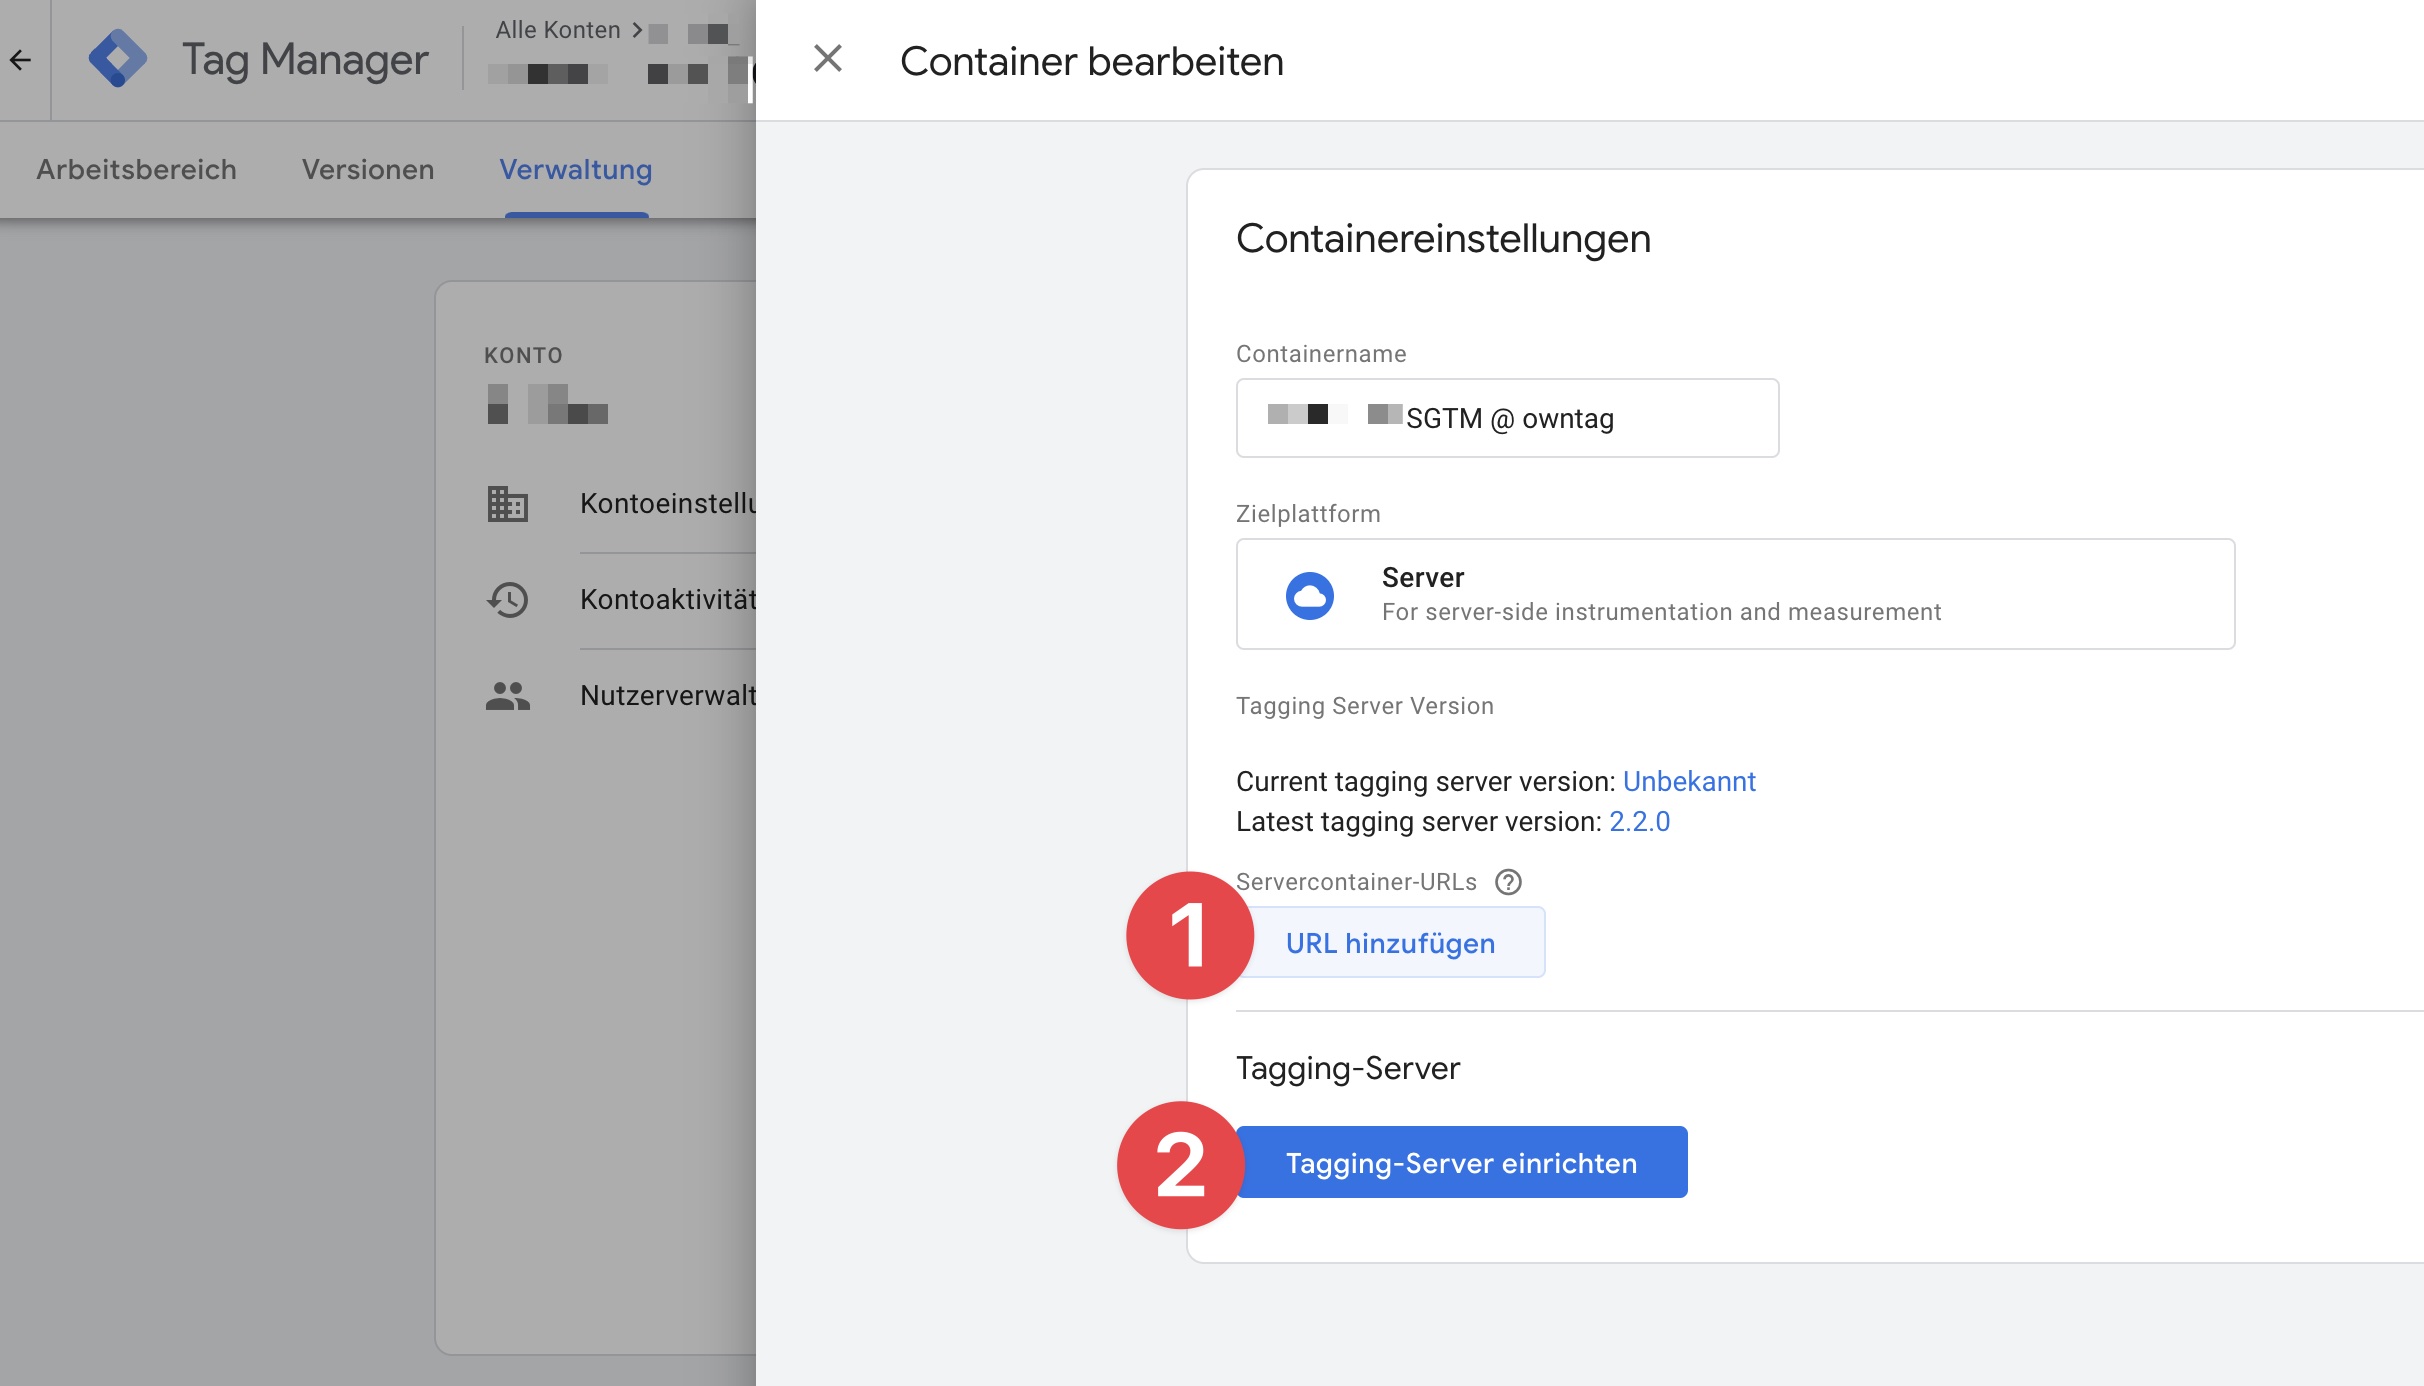
Interface of Tag Manager with an open editing window for container settings. Two red numbered circles highlight the options 'Add URL' and 'Set up Tagging Server' used for configuring the container.

Now you can also use the preview mode in the Server Side GTM.

Next Step: Create Your Own Subdomain for Your SGTM

You’re now ready to test and implement your first tags.
To truly kick off with Server Side Tagging and track your website in live operation, we recommend setting up your own subdomain for your Server Side GTM Container.

You can find the details in our Custom Domains Guide.