Outbrain Server-to-Server Template
The tag template for fully server-side conversion tracking with Outbrain using the Server Side Google Tag Manager.

Importing the Outbrain Tag Template
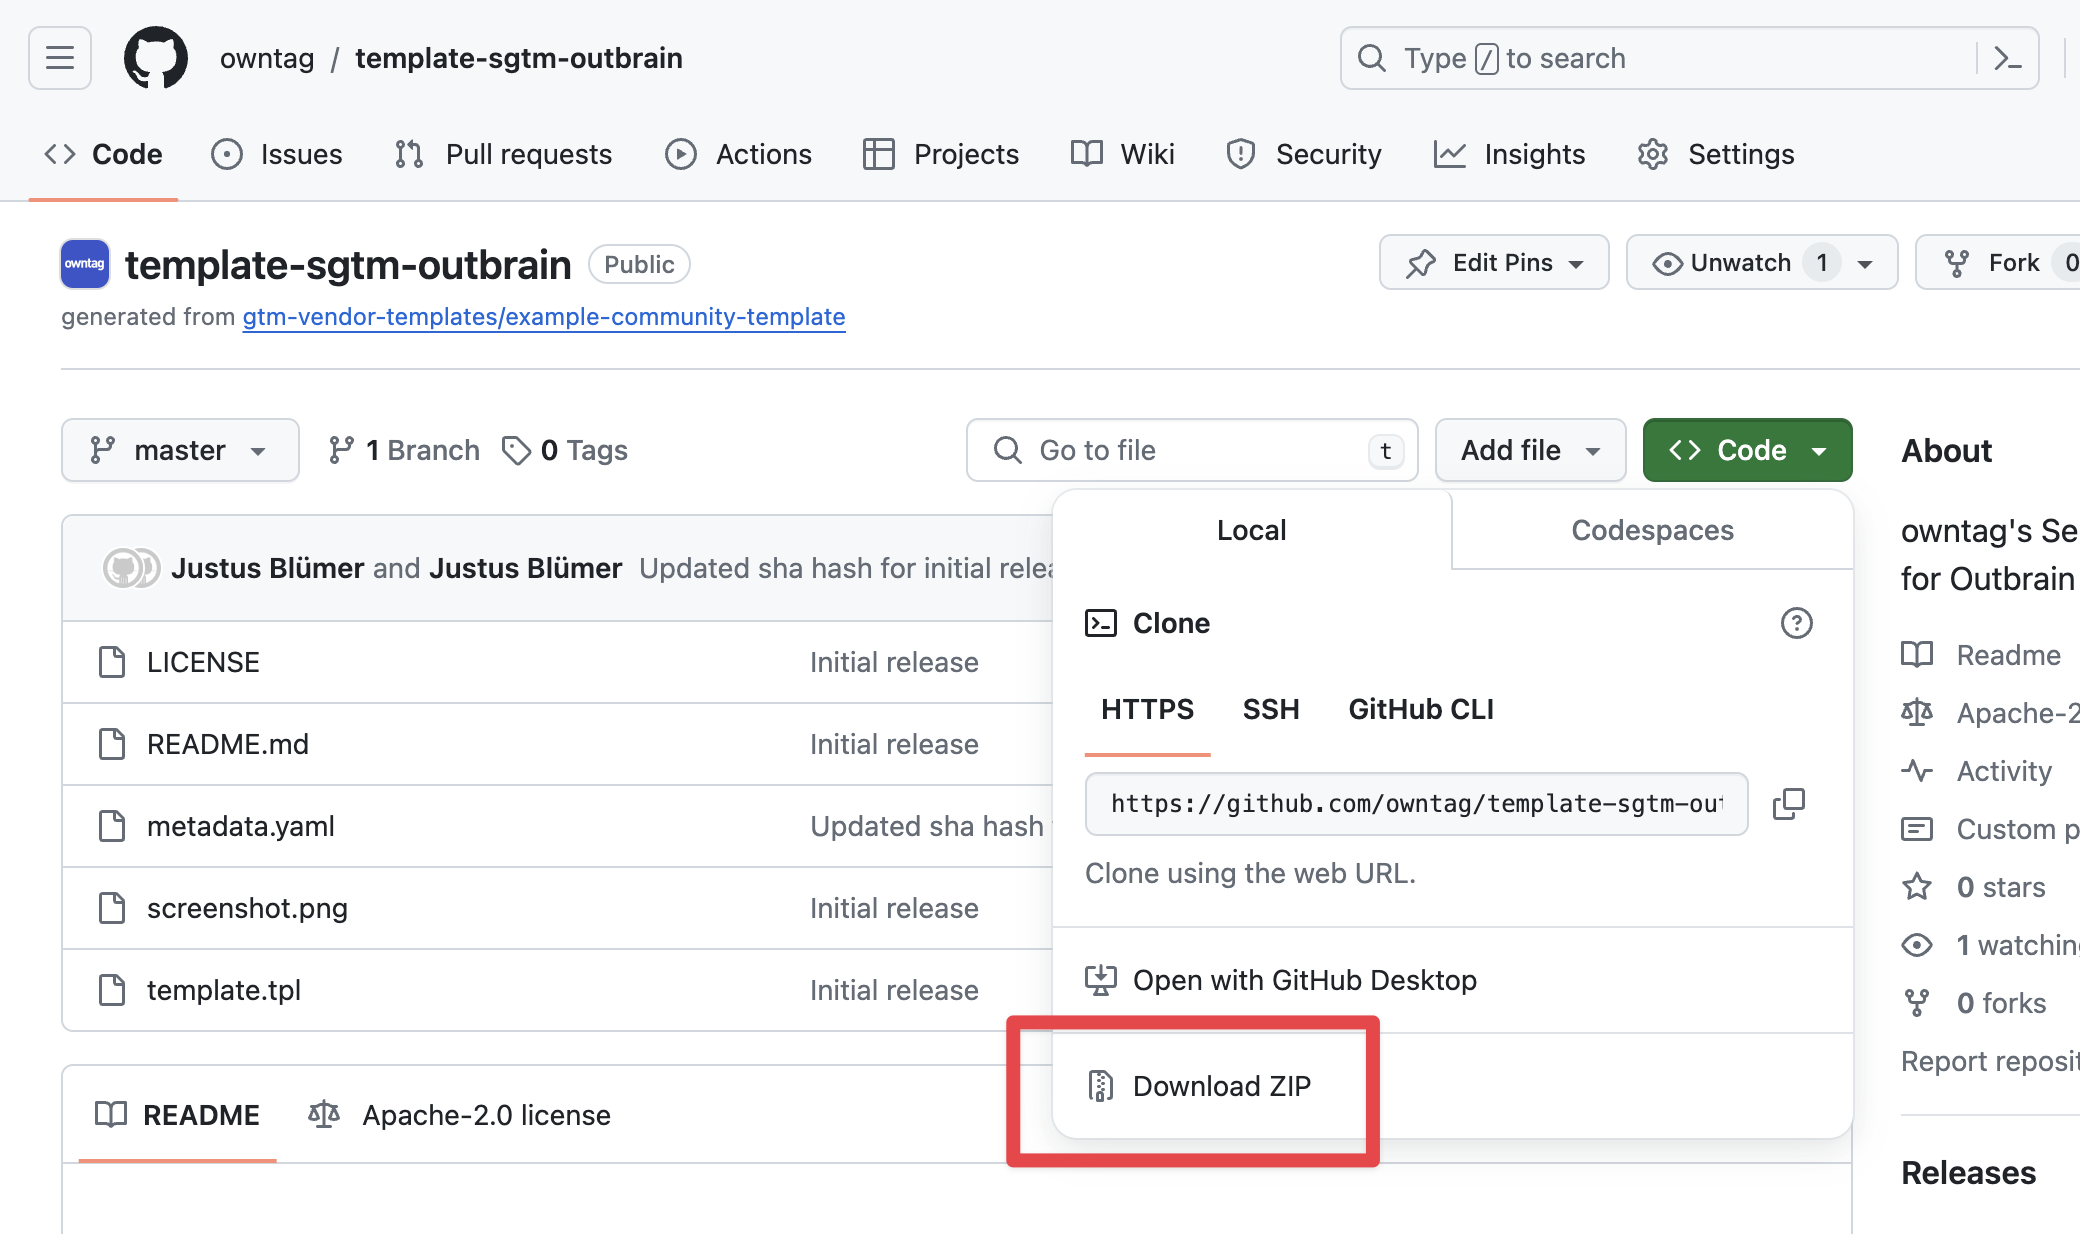
First, download the Outbrain Tag Template from Github:
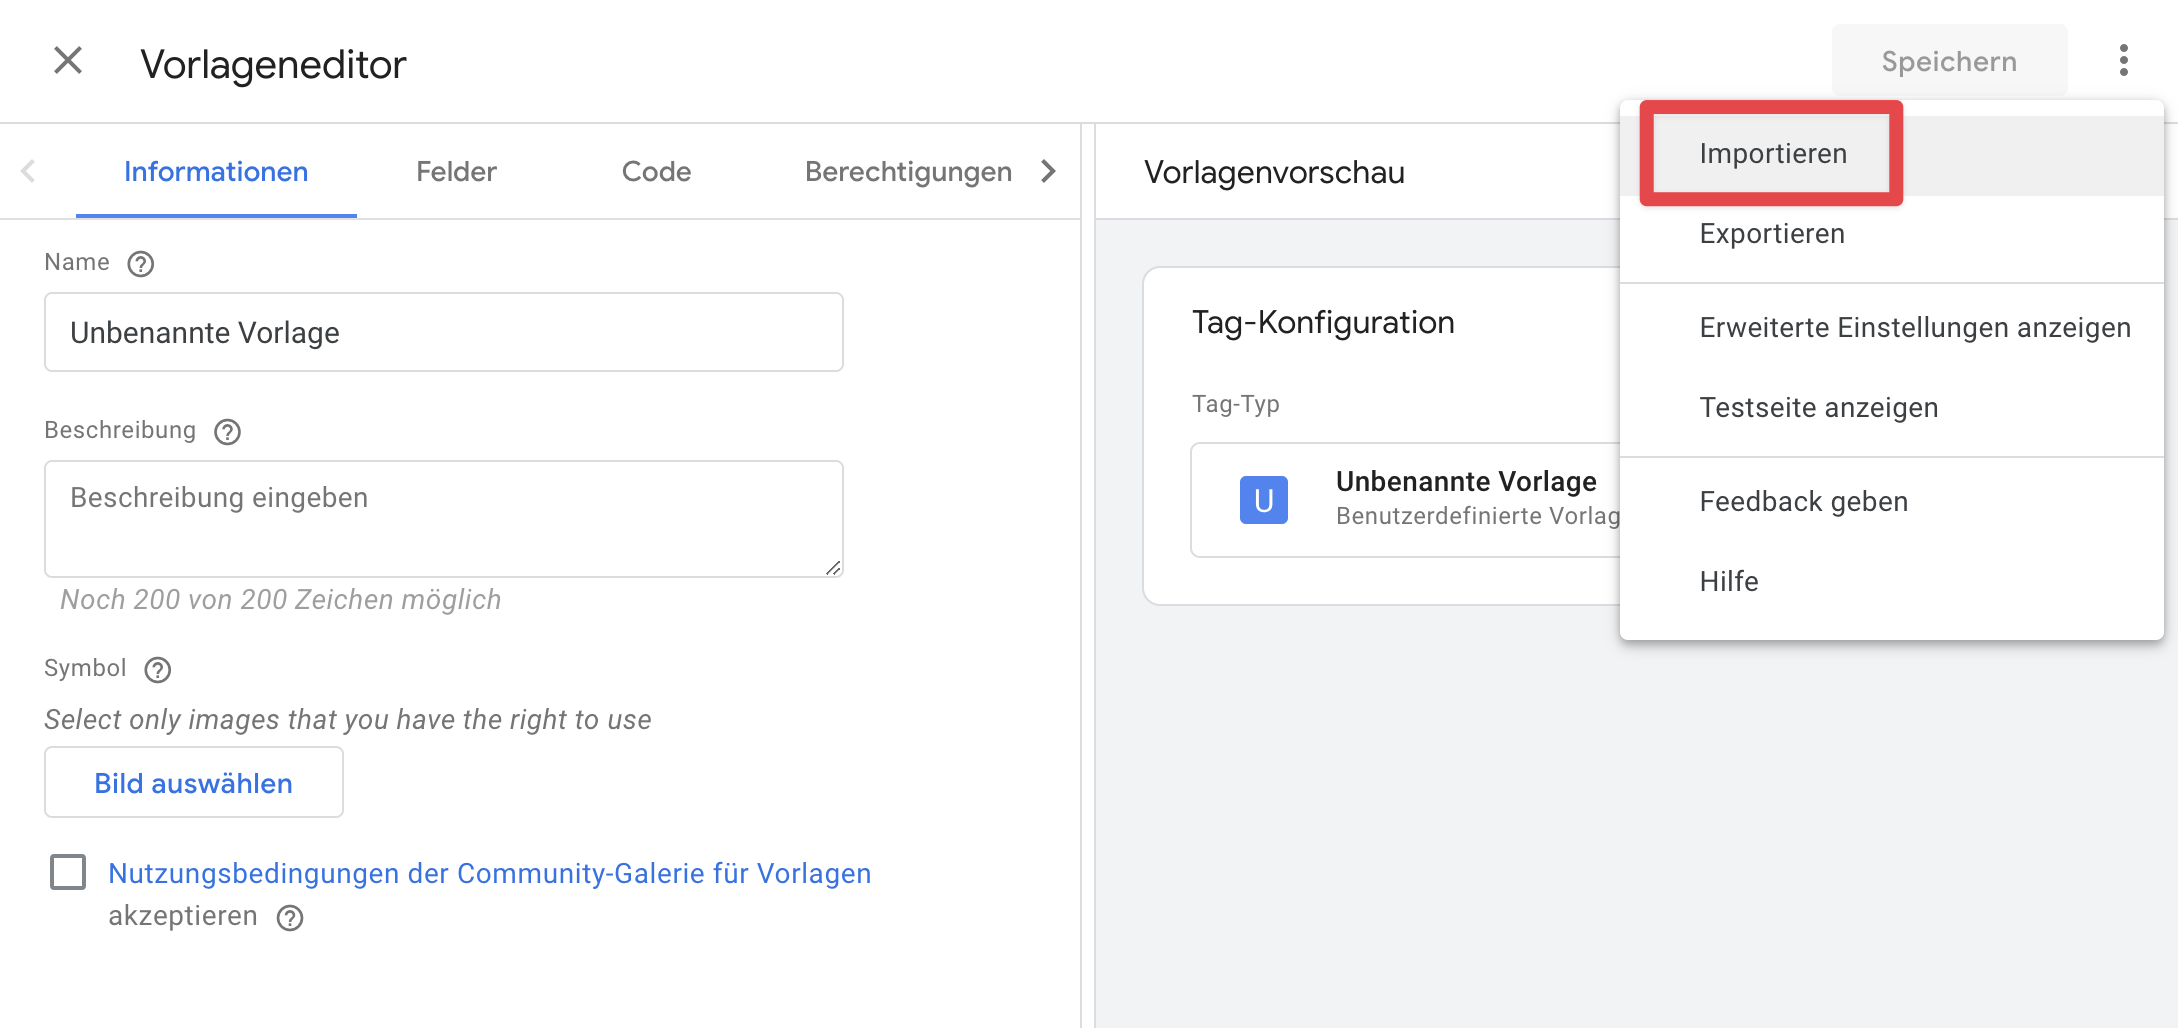
In your Google Tag Manager Server Side container, go to the “Templates” section. Under “Tag Templates,” click the “New” button and import the downloaded template:
Configuring the Outbrain Pageview Tag
After importing the template, create a new tag in the “Tags” section and select the newly imported “Outbrain Server-to-Server” tag template as the type.
First, create a tag of the event type “Pageview.” This should be triggered primarily when a user arrives on your website from Outbrain:
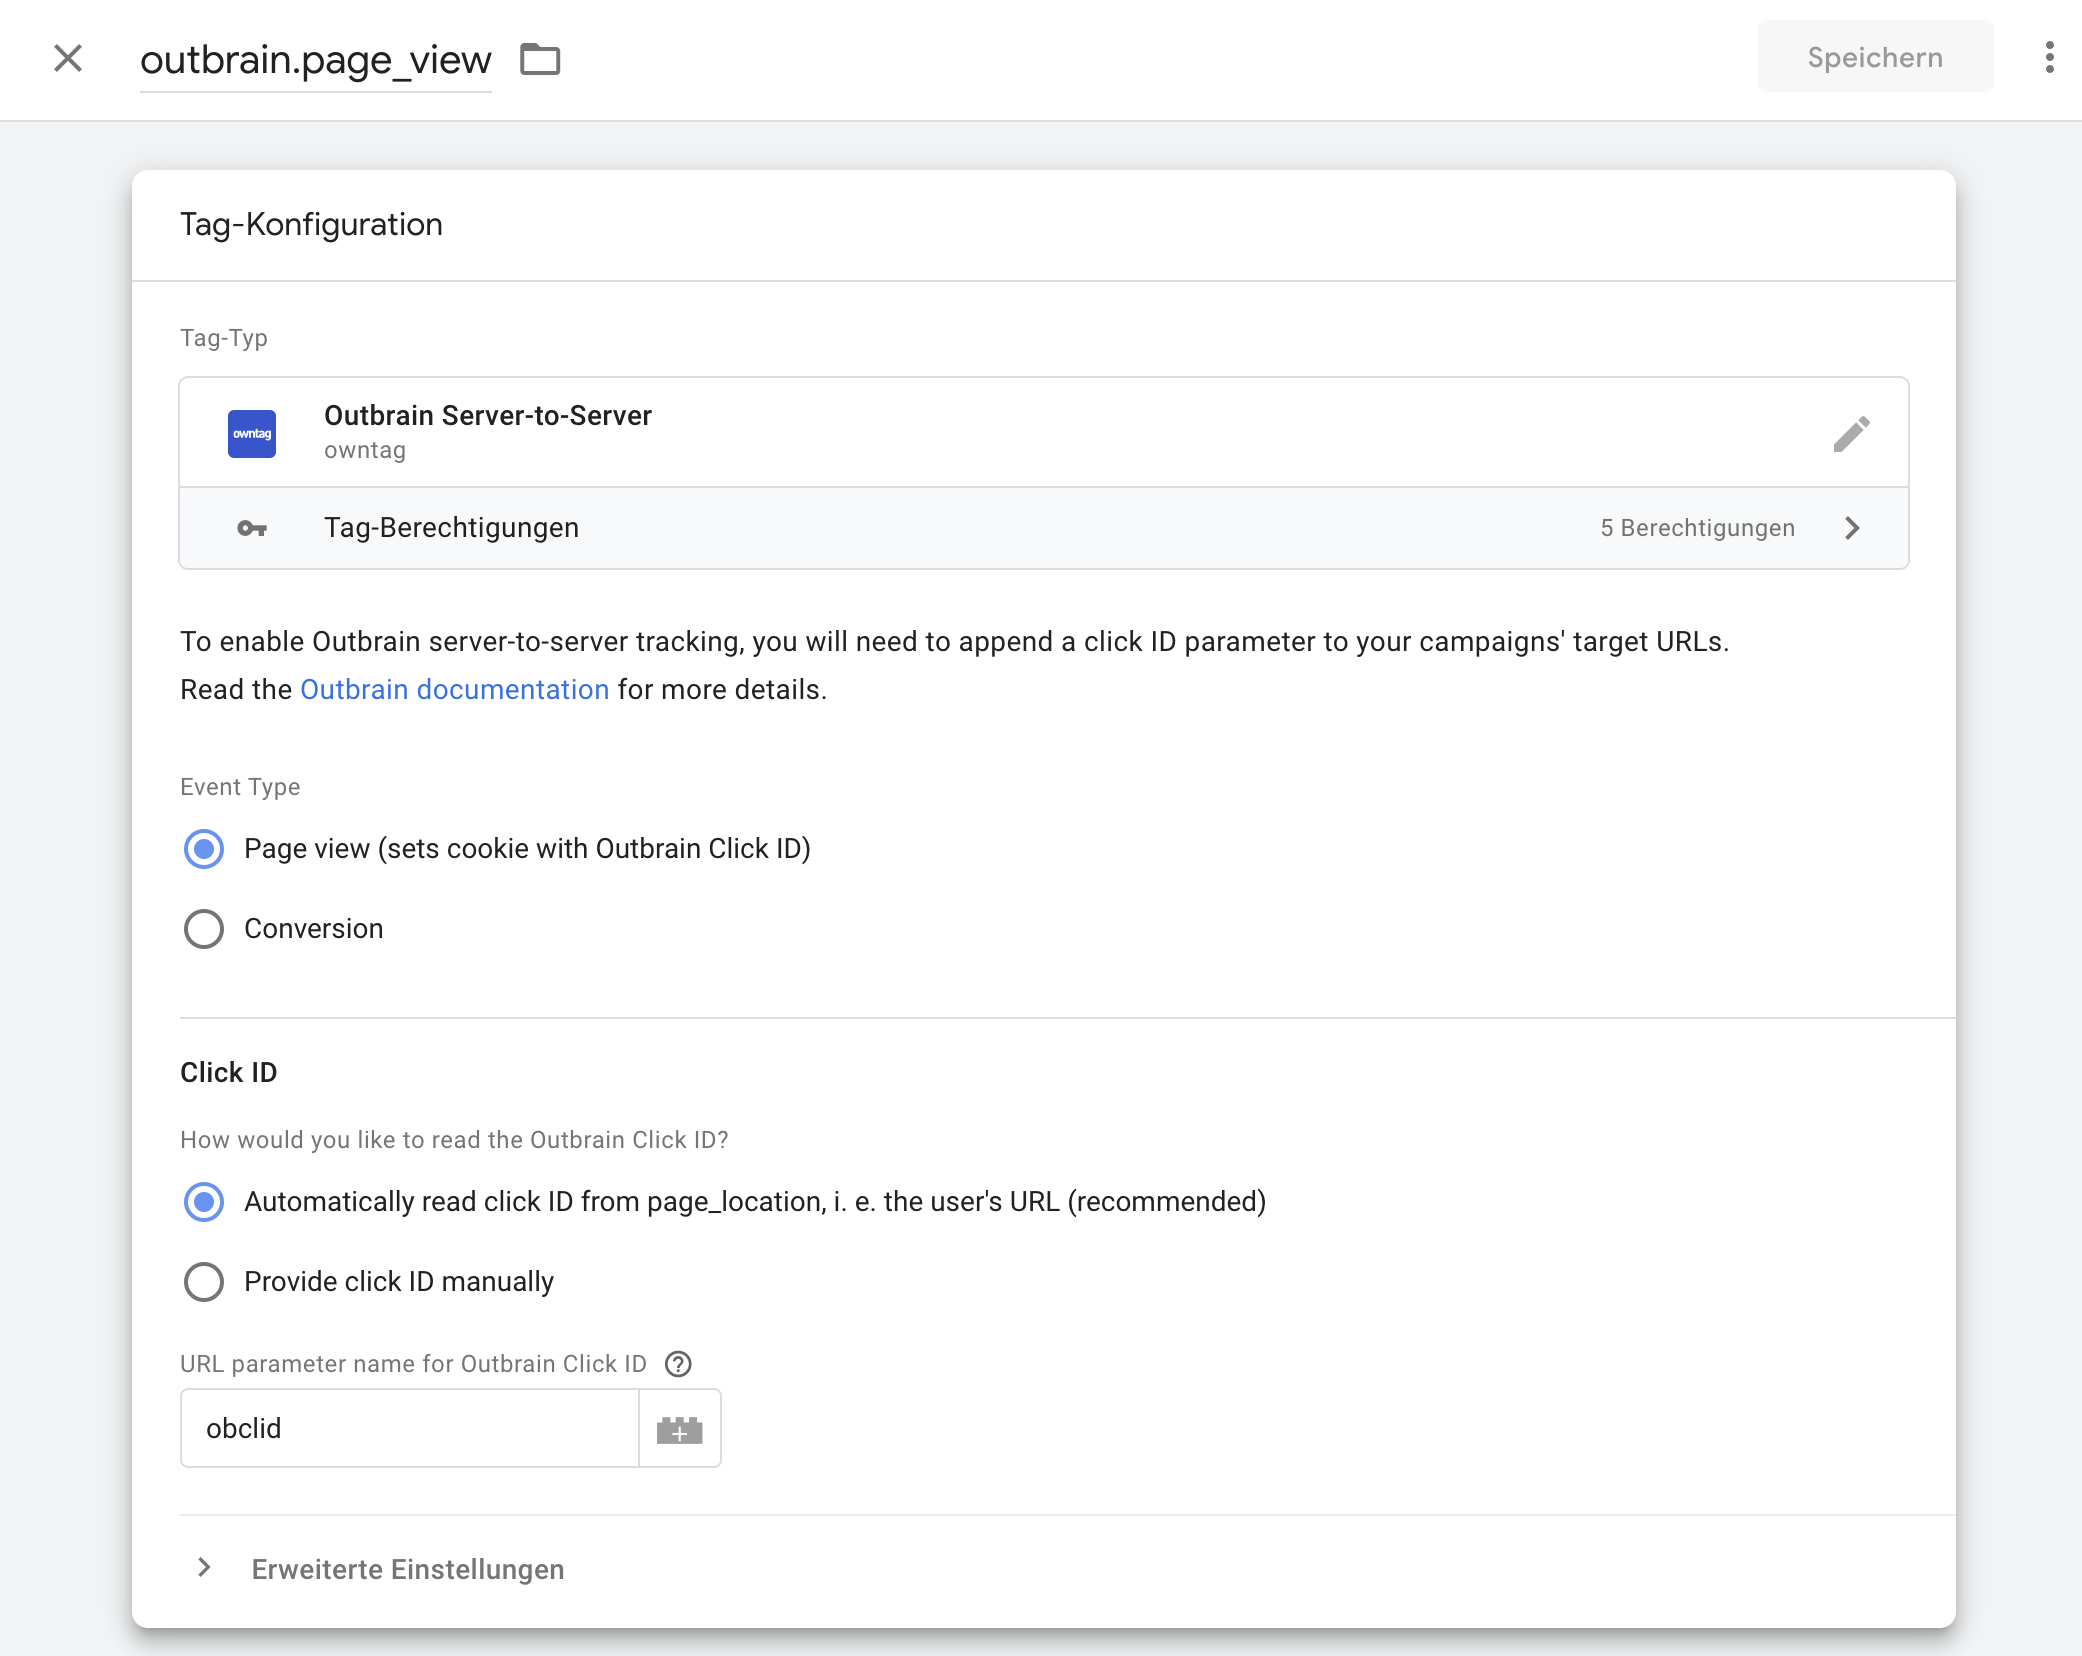
Add a suitable trigger to the tag to ensure it is fired on page views. This can be the default “All Pages” trigger in SGTM. If you’re using a different event name, use that.
This setup ensures that the value of the URL parameter obclid is stored in a cookie. Your Outbrain traffic arrives with this URL parameter, which is unique for each click on an Outbrain ad.
This value is crucial for conversion tracking, as it allows Outbrain to associate later conversions with the click and the Outbrain campaign.
If you prefer, you can change the name of the URL parameter or read it from a variable, for example, if you have stored the click ID server-side instead of in a cookie.
Configuring Click ID Parameter in Campaigns
Important:
To ensure the obclid parameter is automatically appended to the URL of your landing page, you need to configure this yourself. This can be done either when creating the campaign or later in the campaign settings, which you can edit as follows:
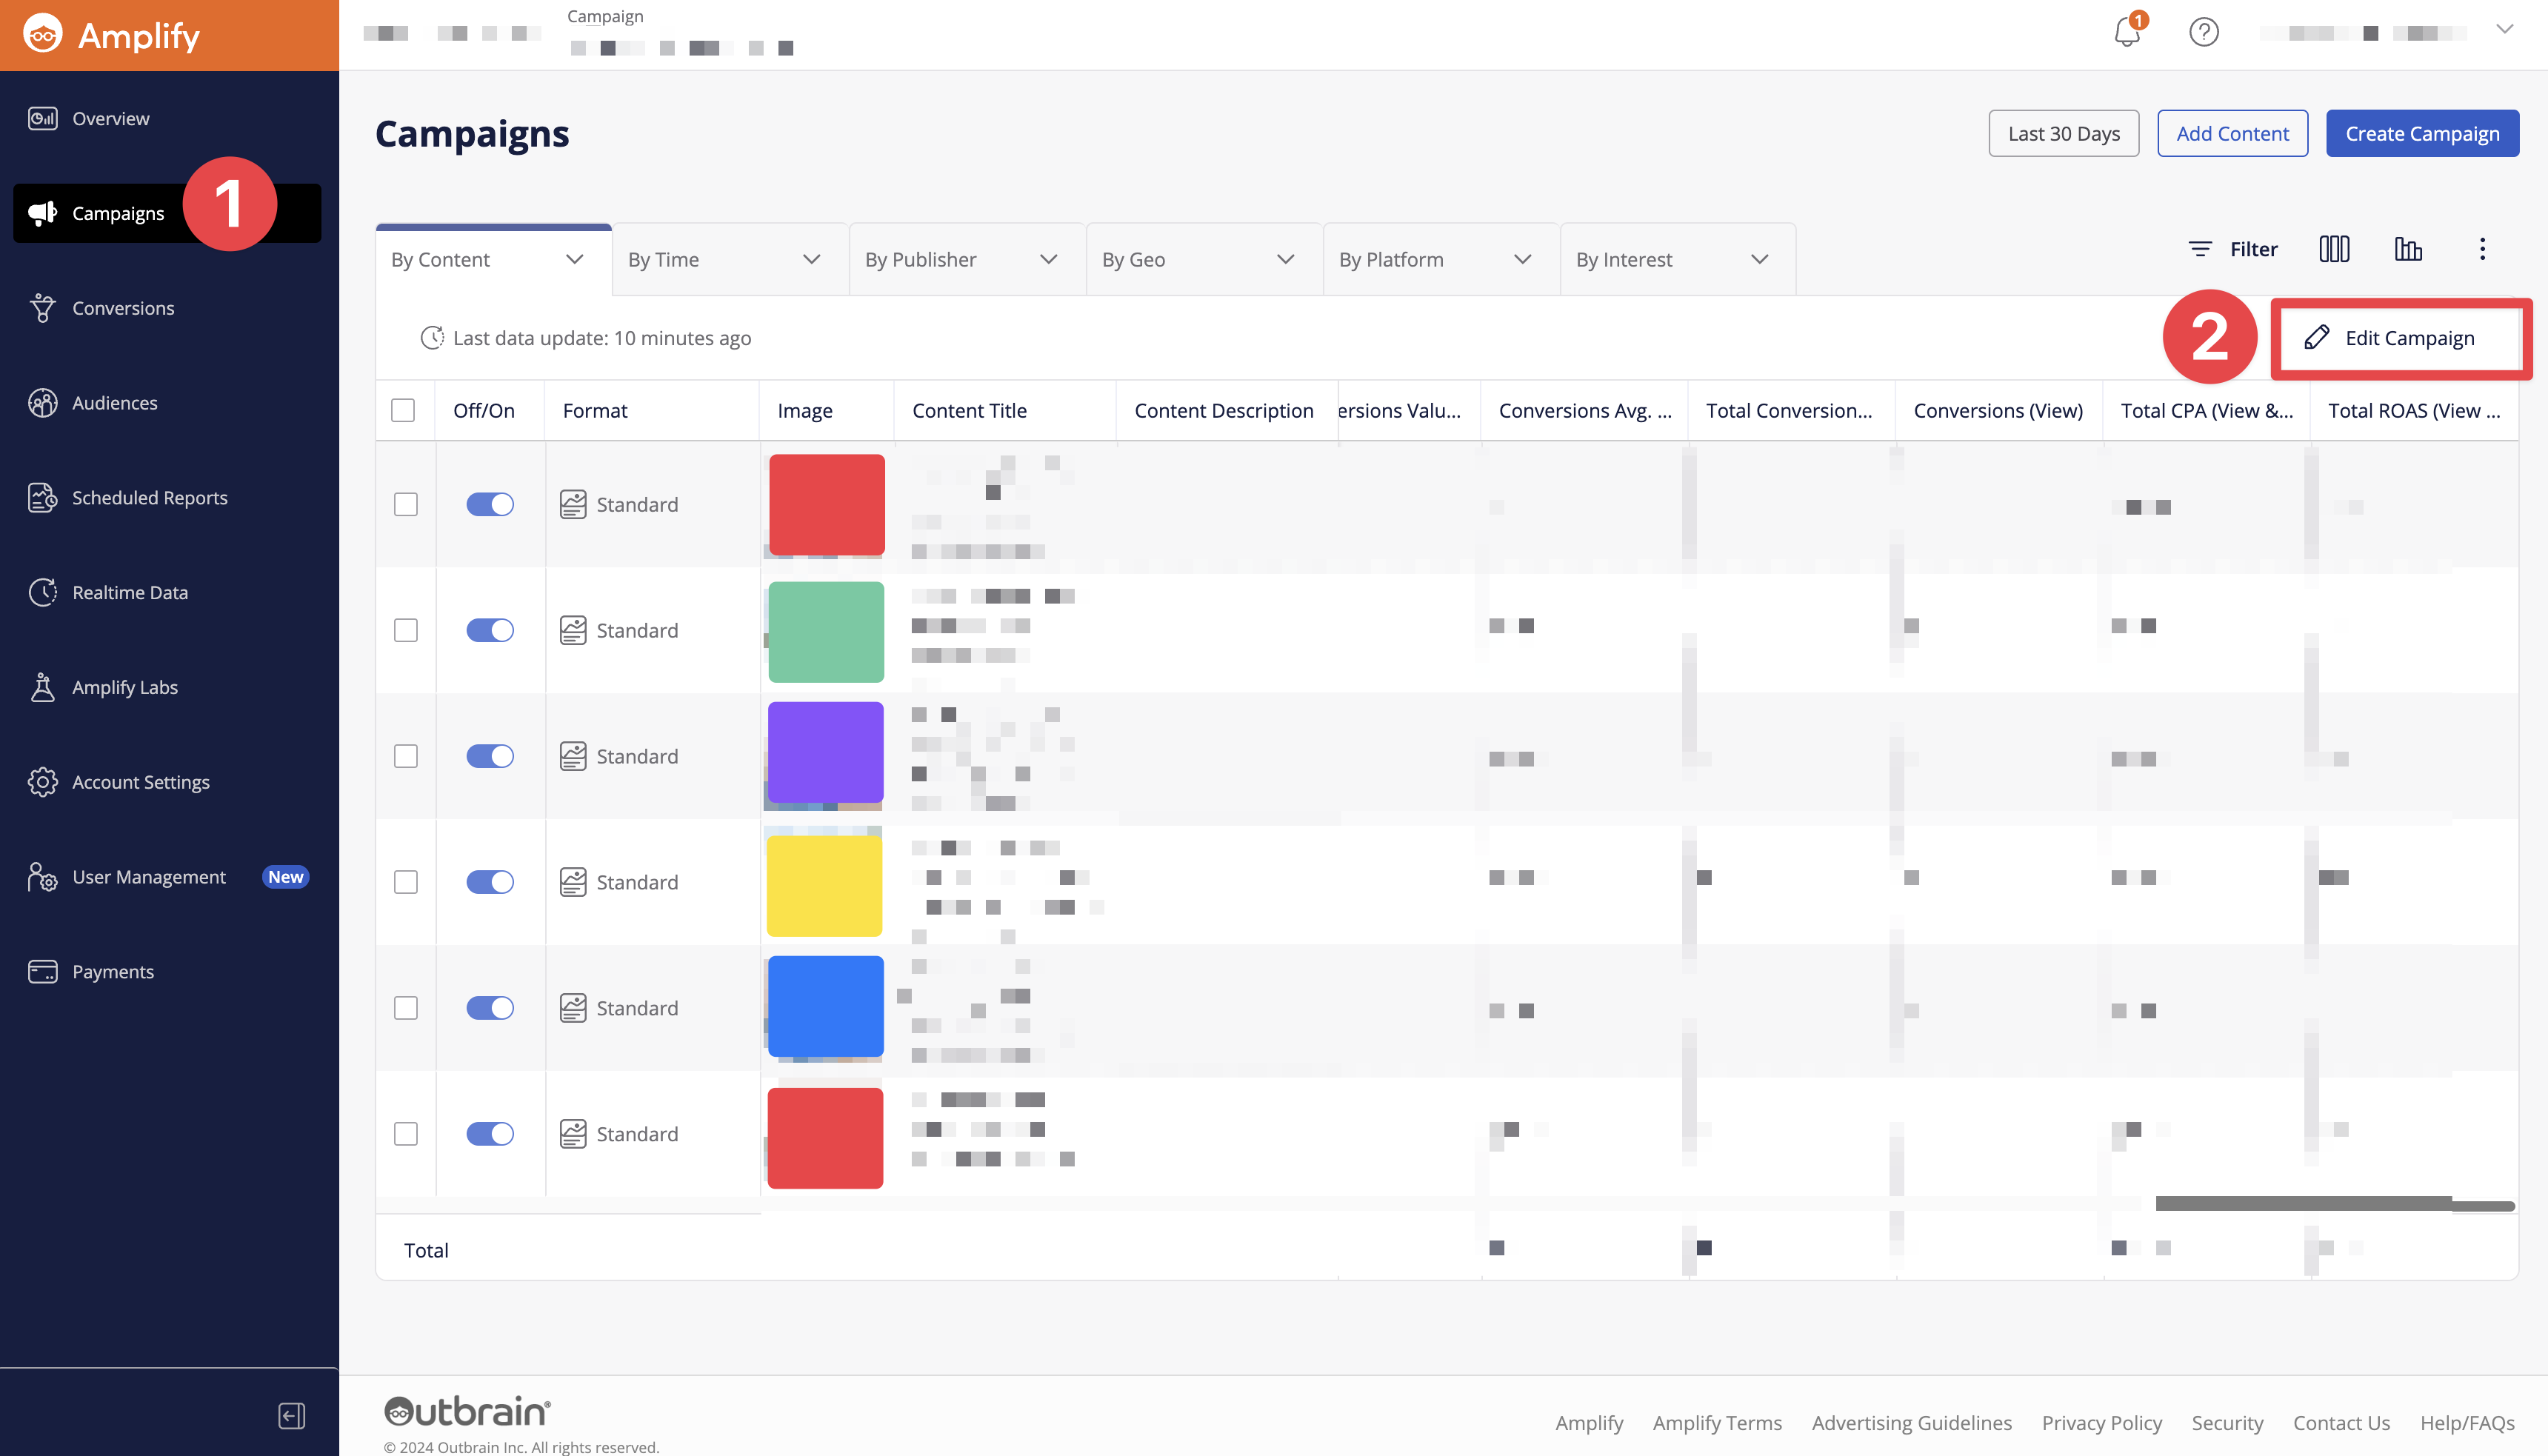
In the campaign settings, find the field under “Advanced Targeting”:
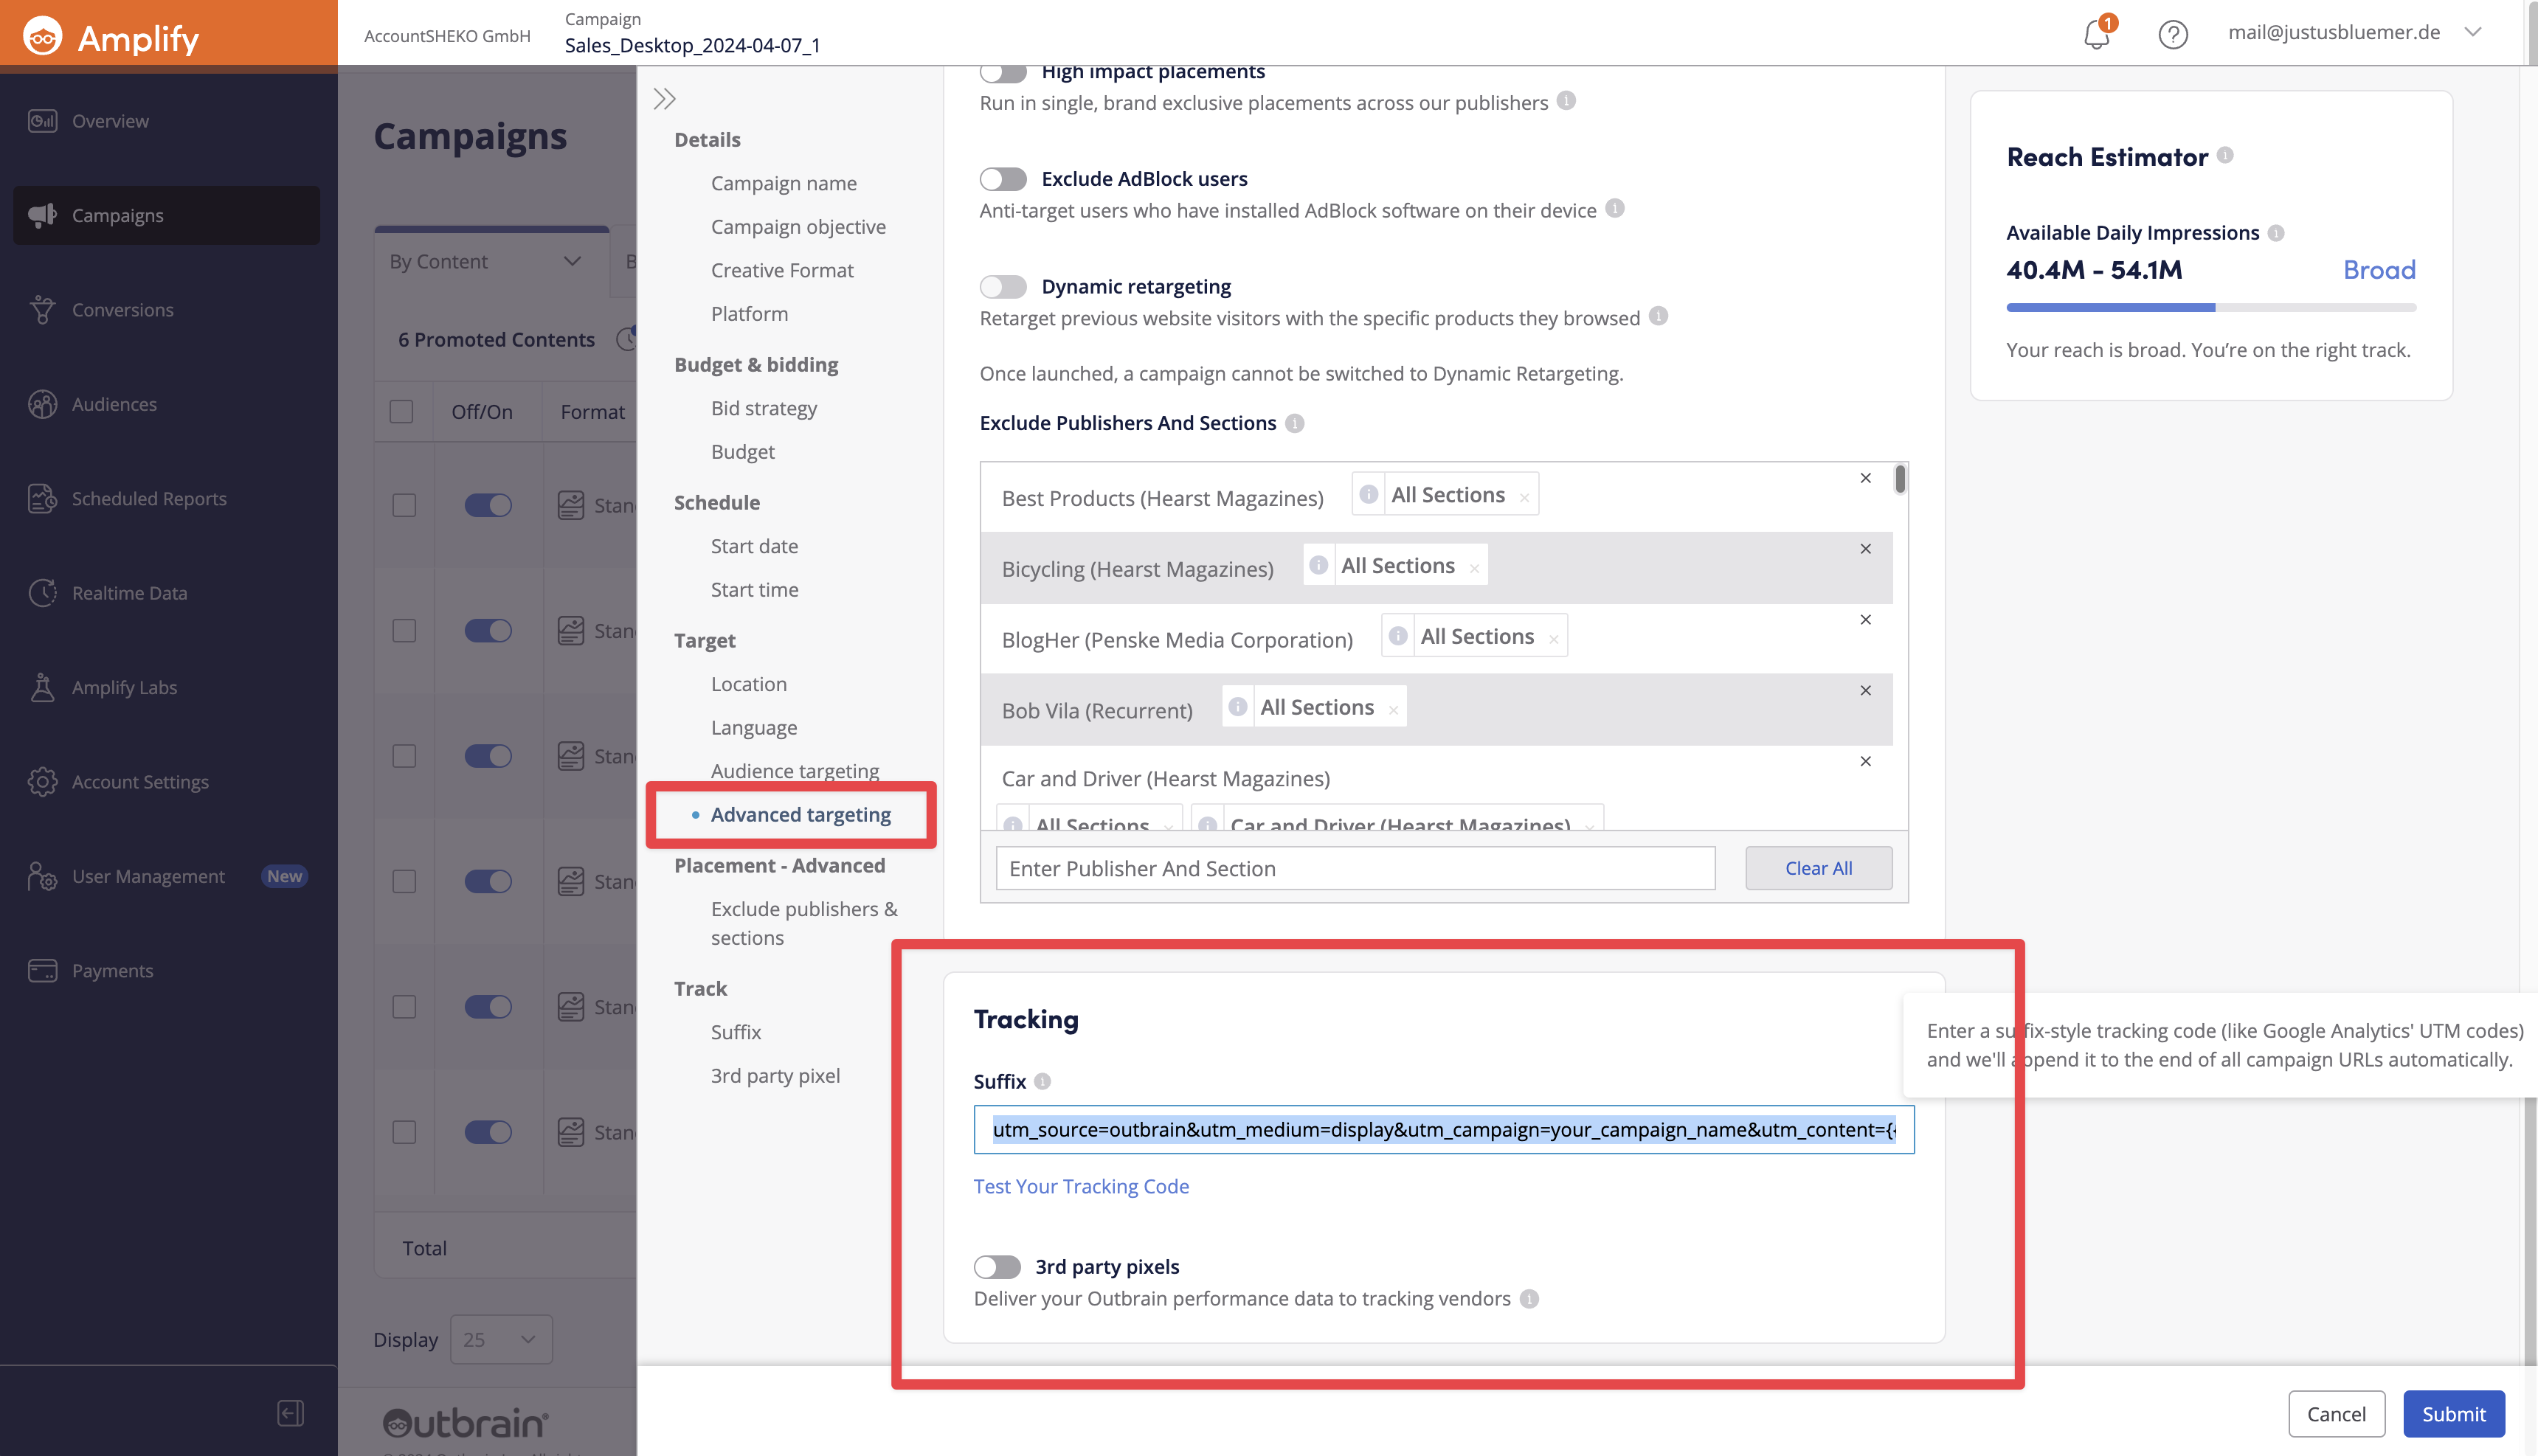
Add obclid={{ob_click_id}} to this field to have it automatically appended to your landing page URL.
If the field is empty, it’s a good idea to also add UTM parameters for Google Analytics. Simply copy this text and paste it into the field:
utm_source=outbrain&utm_medium=display&utm_campaign=your_campaign_name&utm_content={{ad_title}}&utm_term={{publisher_name}}_{{section_name}}&utm_id={{section_id}}&obclid={{ob_click_id}}
Creating the Conversion Tag
To enable Outbrain to track the conversions of your campaigns, you need to create another tag, this time of the event type “Conversion.”
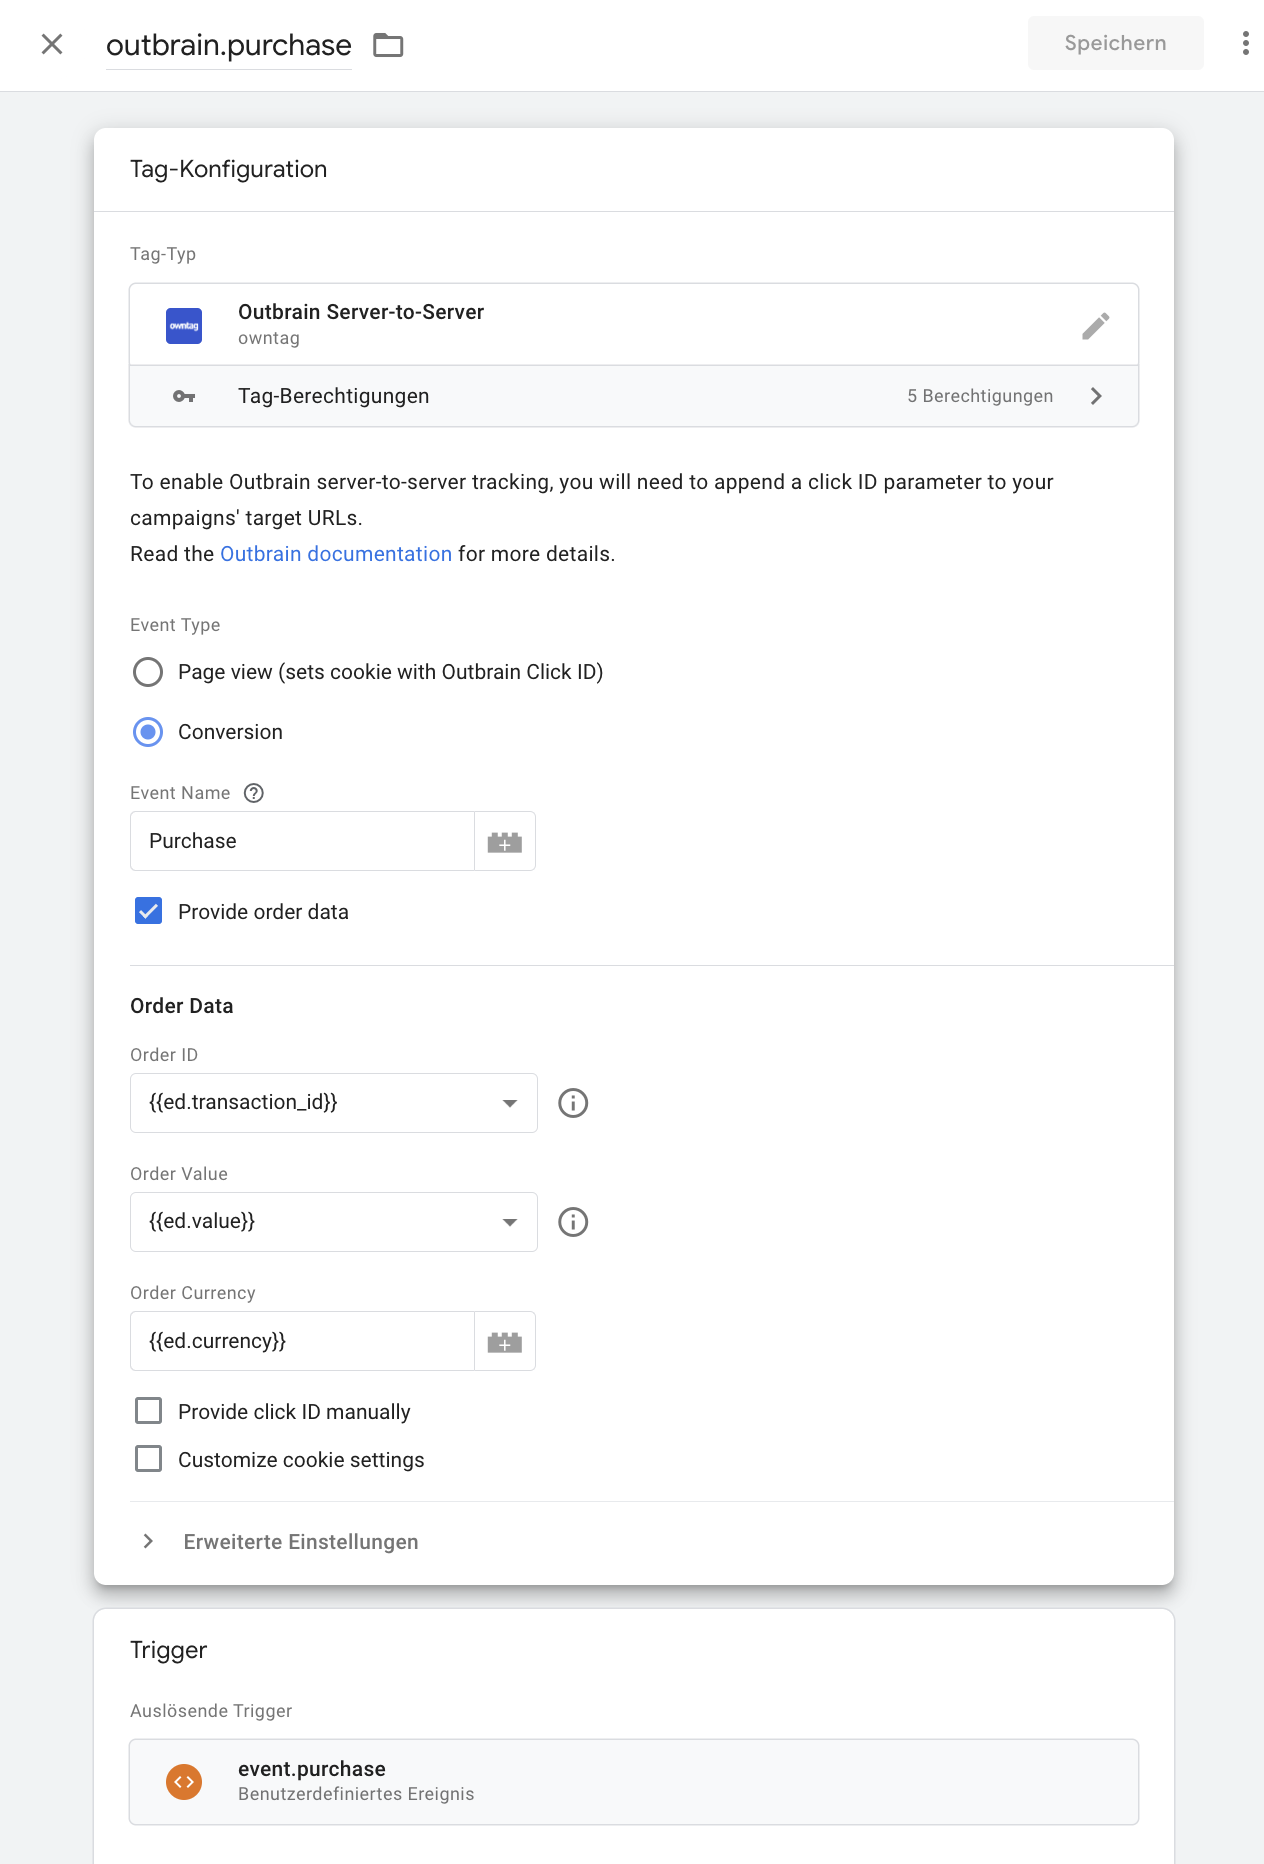
In this example, the conversion is called “Purchase” and is triggered by the event of the same name. Since it involves an e-commerce purchase, the “Provide order data” checkbox is selected to pass the revenue and a unique order number.
The conversion tag automatically looks for a cookie named obclid to read the click ID stored by the pageview tag and send it with the conversion to Outbrain.
If you named your cookie differently in the pageview tag, you need to adjust this here as well or read the value from a variable.
Testing
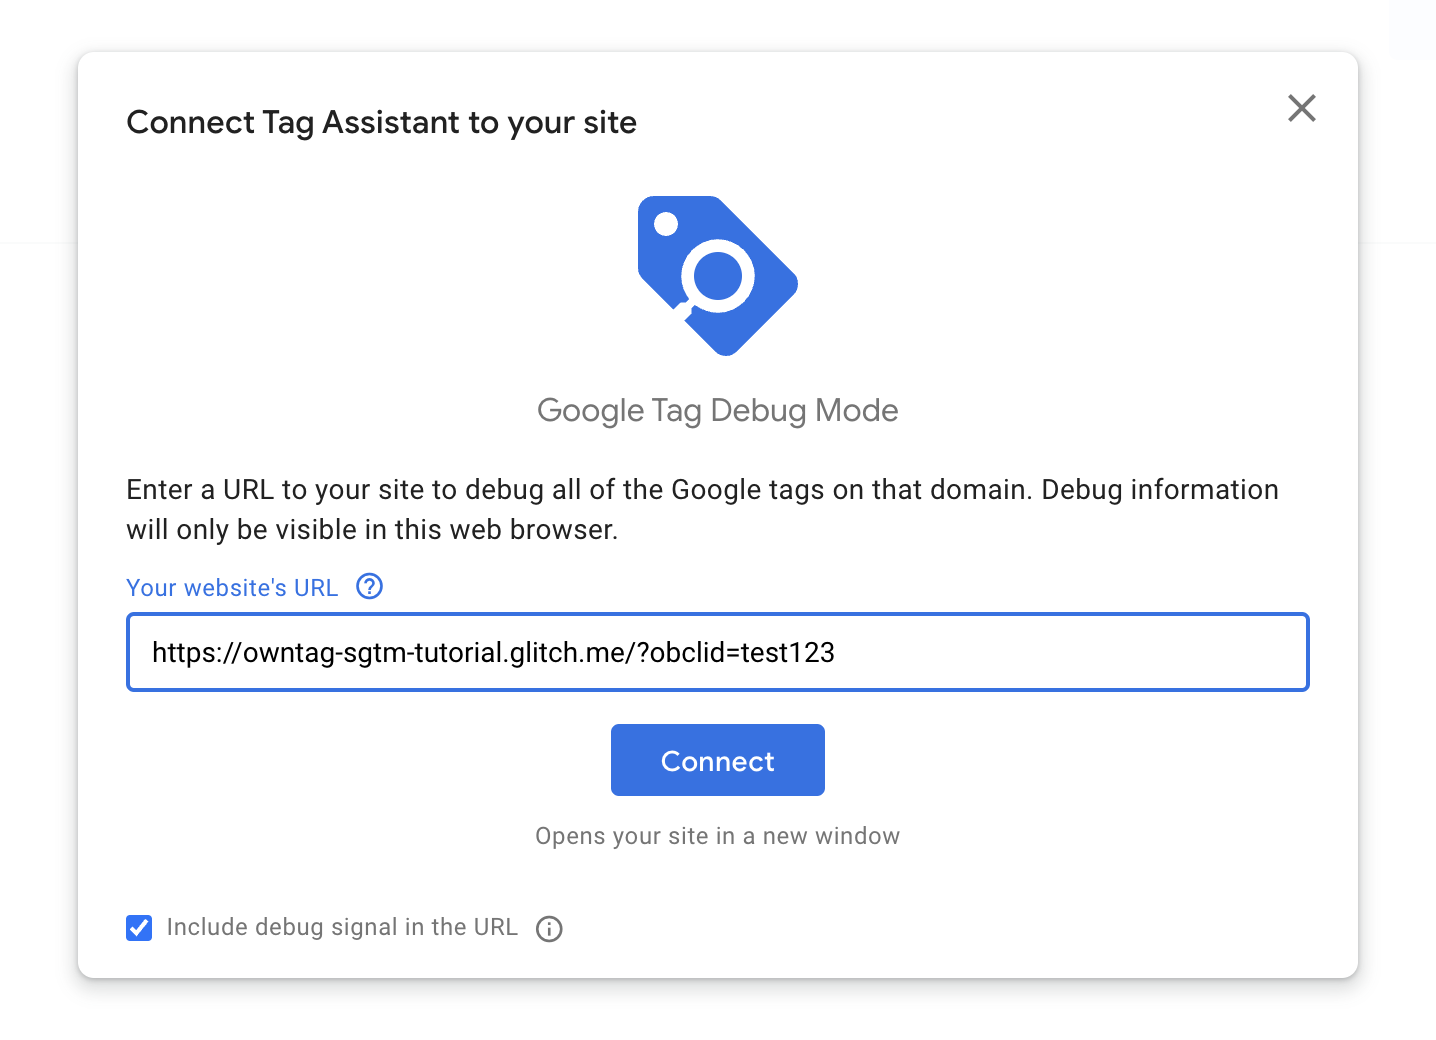
To test the setup, you can use the Preview Mode on your SGTM and check your cookies for the obclid value.
To simulate an Outbrain click, open Preview Mode ?obclid=test123 to your website URL and reload the page.
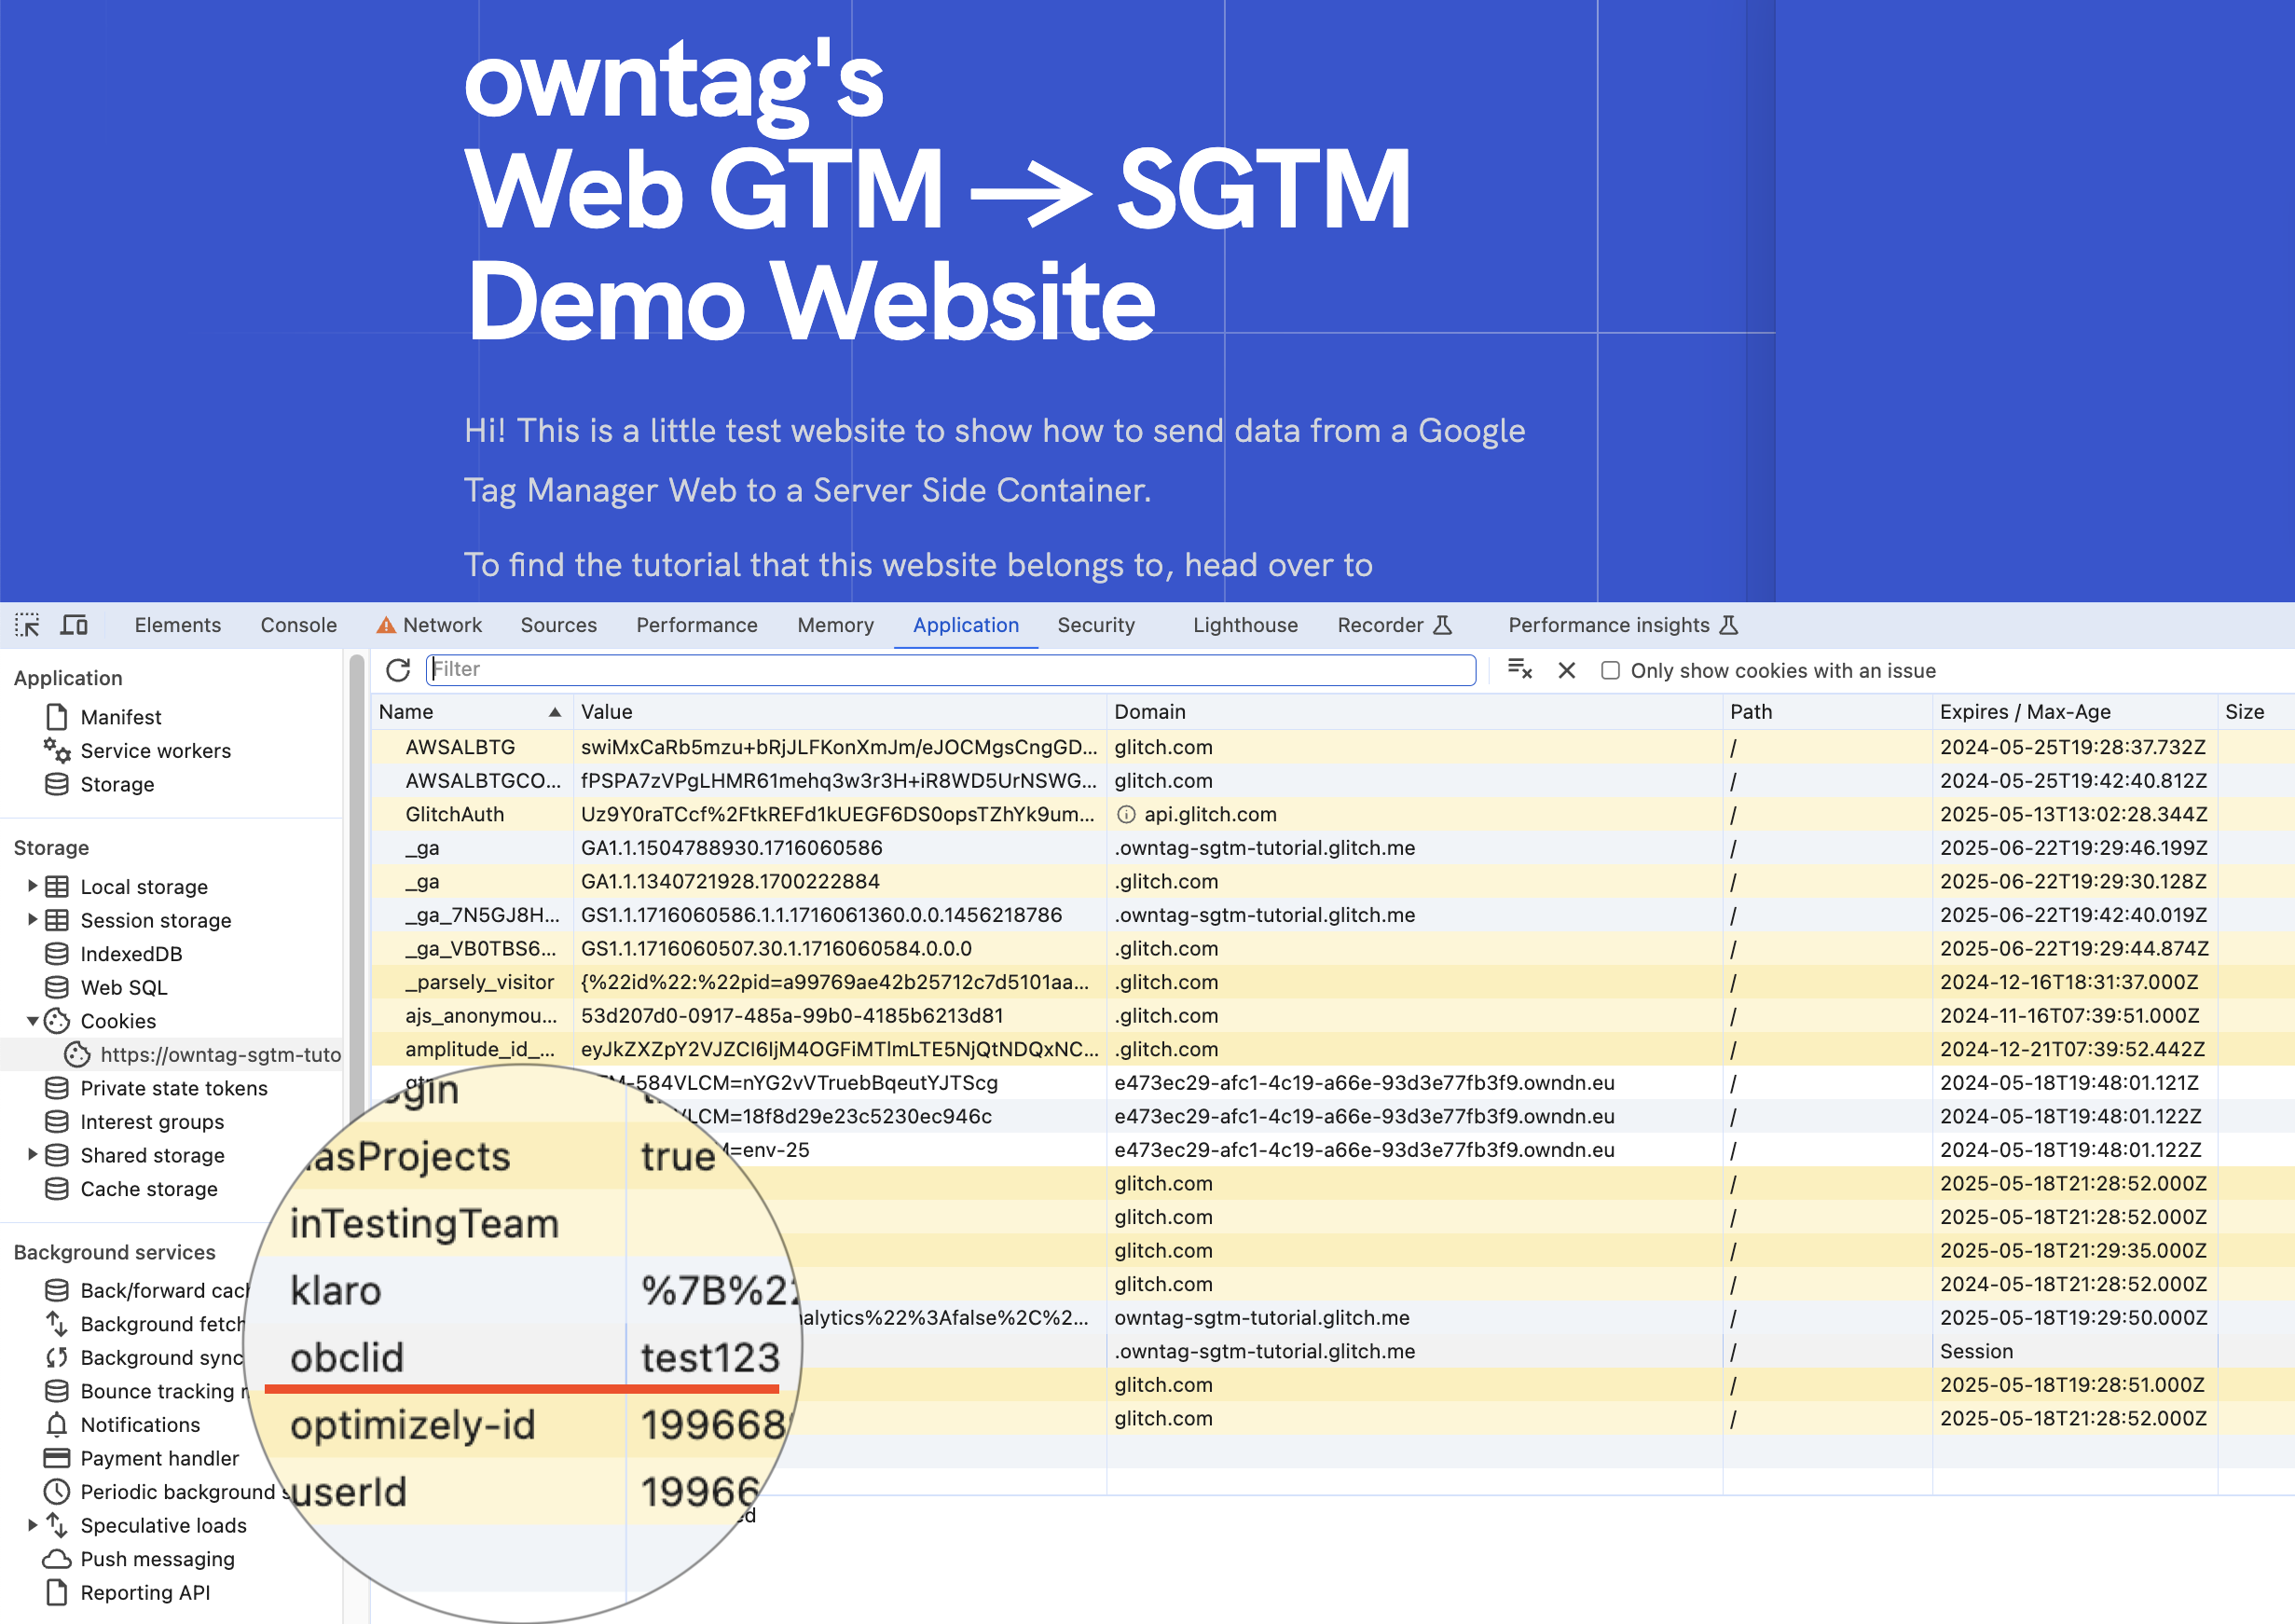
Then, check the cookies in your browser’s developer tools to see if the obclid value is stored correctly. Its cookie should contain the same value as the URL parameter. Here for example in Chrome’s DevTools under “Application” → “Storage” → “Cookies”:
Summary & outlook
If you’ve followed these steps, you’re now enjoying the benefits of server-side conversion tracking with Outbrain:
- No requests from the browser to Outbrain’s servers and therefore less adblocker impact, faster page loads, and more options to control what data is sent to Outbrain
- Improved security because no third party JavaScript from Outbrain is executed in the browser
If you don’t want to rely on an obclid cookie to store your user’s click ID, you could even store it in your own server-side database and pass it to Outbrain from there. As long as you have an independent way of identifying your user and fetching their click ID from the database, you can use this to improve how long you can attribute your conversions to their original traffic source, in this case Outbrain.
